Path of Exile 2 Act 3 Boss Complete Mastery Guide
Last updated on December 10, 2025 by MMOJUGG Team | Game: Path of Exile 2 Guide | Tags: Fate of the Vaal
Act 3 ramps up the intensity in Path of Exile 2, especially with bosses that demand sharp reflexes and solid defenses. These encounters blend relentless minion waves, environmental hazards, and telegraphed dangers—watch for red flashes and audio cues signaling must-dodge moves. Whether you're pushing through the Fate of the Vaal League in version 0.4.0, The Last of the Druids, or revisiting for rewards, knowing each pattern turns frustration into triumphs.
If this guide helps your runs, consider bookmarking it for easy access during tough spots. For faster gearing, swing by our Path of Exile 2 Shop to grab Divine Orbs, Exalted Orbs, crafting currencies, rare items, uniques, and more—stock up and dive back in stronger.
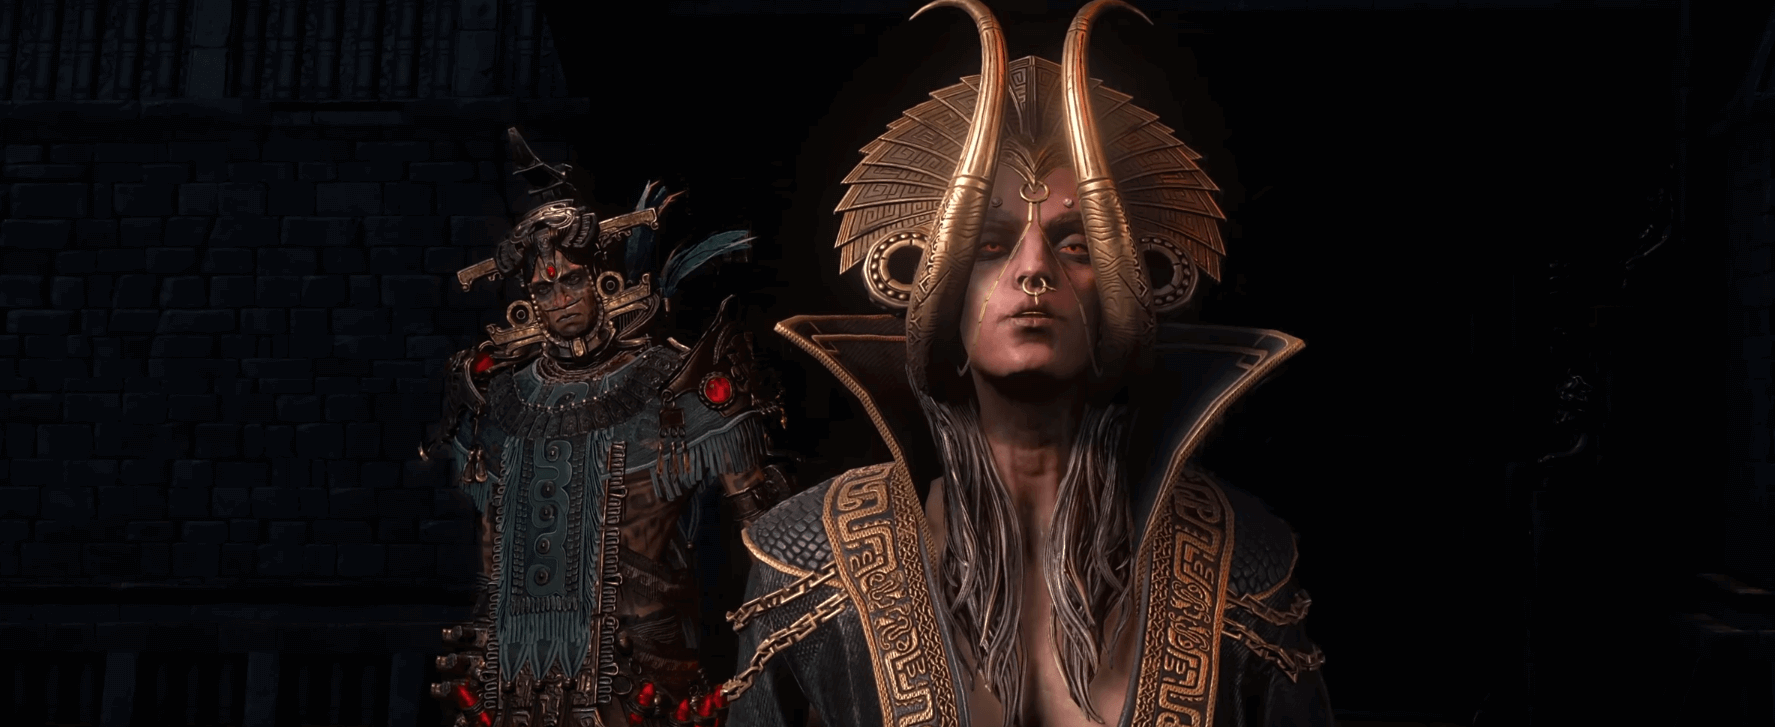
Path of Exile 2 Boss Mastery Guides
To assist Exiles in successfully advancing across the new continent of Wraeclast, we have compiled essential Boss Mastery Guides for every Act and Interlude in Path of Exile 2. Below is the complete list of Boss Mastery Guides:
Act 1 Boss | Act 2 Boss | Act 3 Boss | Act 4 Boss | Ogham Interlude | Kriar Interlude | Vastiri Interlude
Path of Exile 2 Act 3 Boss Overview
Boss Name | Location | Key Tips |
|---|---|---|
Rootdredge | Sandswept Marsh | Manage endless minions by baiting corpse-exploding slams at 90% HP; dodge homing volatile orbs; quicksand pools (move to clear slow stacks). |
Mighty Silverfist | Jungle Ruins | Prioritize dodging one-shot Sunder lines (red flash); circle to evade combo swings, cyclone advances (75% HP). Drops 2 Weapon Set Skill Points. |
Ignagduk, the Bog Witch | The Azak Bog | Phase 2 (75% HP): Hide behind boss for V-fire corridors; use ice circles safely for flamethrower. Drops Gemrot Skull (+30 Spirit). |
Xyclucian, The Chimera | Chimeral Wetlands | Destroy pillars to stun during high-ground volleys (90% HP); dodge fixed diving slams, elemental breaths/orbs. Drops Chimeral Ultimatum for 2nd ascendancy. |
Blackjaw, The Remnant | Jiquani's Machinarium | Circle-run slam combos (65% HP), outrange Flame Frenzy (50% HP); evade fiery axe sweeps/breaths. Drops Flame Core (+10% Fire Resistance). |
Zicoatl, Warden of the Core | Jiquani's Sanctum | Hug pyramid explosion corners; avoid telegraph lines in Lightning Grid (50% HP), roll through converging beams or past boss. |
Mektul, the Forgemaster | The Molten Vault | DPS race vs. rising lava—burst outside lava phases (reduced boss damage taken); dodge rupture lines. Drops Hammer of Kamasa (Reforging Bench). |
Queen of Filth | Apex of Filth | Detonate mushrooms proactively to avoid chains; dodge cursed stomps (color-coded debuffs); clear 90% HP minions. |
Ketzuli, High Priest of the Sun | Temple of Kopec | Strafe linearly vs. tracking salvos; sidestep orbs/orbits (Black Hole Suns at 80%/30% HP), ramping Gamma Ray (70% HP). |
Viper Napuatzi | Utzaal (Past) | Toughest fight: Manage reflects off shield walls; dodge Spear Hell (shrinking arena via guard waves—roll finale). |
Doryani, Royal Thaumaturge | The Black Chambers (Past) | Phase 2 mech: Safe inside lightning cage; right-side disco lasers, roll behind Vaal ice bursts (40% HP), evade tracking fist. |
Taming Rootdredge's Minion Onslaught
Deep in the Sandswept Marsh, Rootdredge unleashes physical and fire damage amid endless swamp-spawned minions. Stay mobile to manage adds while chipping away at the boss.
Core moves include a close-range staff stomp and ranged triple projectiles. Key threats escalate with abilities like turning minions into chasing, explosive orbs (frequency rises as health drops), ground pools that stack movement slows (sidestep to shed debuffs), and direct minion summons around you.
At 90% health, expect area slams that detonate nearby corpses, chaining explosions to clear living minions—position smartly to trigger this for crowd control.
Ability | Trigger | Dodge Tip | Damage Type |
|---|---|---|---|
Volatile Orb | Any phase, more at low HP | Run perpendicular to path | Fire/Phys |
Quicksand Pool | Player-targeted | Keep moving | Slow debuff |
Corpse Slam | 90% HP+ | Bait near minions | Phys/Fire AoE |
Victory yields minion management practice and progression.
Surviving Mighty Silverfist's Brutal Swings
Jungle Ruins host Mighty Silverfist, a physical powerhouse whose hits can flatten unprepared exiles. Prioritize evasion over trading blows.
Baseline sweeps with his massive pillar dominate. The deadly Sunder cracks the ground in a line—dodge sideways at the red flash to survive its one-shot potential.
Post-90% health: Combos chain default swings into Sunder. By 75%, Cyclone Swings whirl the pillar twice while closing distance, capping with Sunder; a leaping Roll follows up close.
Phase Threshold | New Threats | Survival Strat |
|---|---|---|
90% | Combo into Sunder | Strafe patterns |
75% | Cyclone + Roll | Circle and leap away |
High damage output rewards perfect positioning.
Outmaneuvering Ignagduk's Bone Barrage
The Azak Bog's Ignagduk mixes physical and fire in a two-phase spectacle. Phase 1 focuses bone summons; Phase 2 ignites the arena.
Always: Broom rides circle the zone, trailing bone spikes (three charges per loop). Red sigils erupt into spikes, shattering prior clusters; bone walls sunder toward you; half-circle spears fire player-aimed; frontal bone cones precede charges.
At 75% health, a final broom crash ushers Phase 2: Fireballs, V-splitting Infernal Corridors (hide behind her), volley fireballs, converging firewalls, repeated eruptions, dashes, and channeled flamethrowers (safe in temporary ice circles, but exit before burst).
Phase | Signature Moves | Key Counter |
|---|---|---|
1 | Broom, Eruptions, Spears | Circle arena edges |
2 | Corridors, Flamethrower | Backline positioning |
Defeating her grants Gemrot Skull: permanent +30 Spirit and a level 10 Uncut Spirit Gem.
Conquering Xyclucian's Elemental Fury
Chimeral Wetlands pit you against Xyclucian, hurling physical, chaos, cold, fire, and lightning. Baseline bites, leaps, ground slams, rear wing buffs (avoid backline), frost breath chilling grounds, fireballs, and tight flame cones.
At 90%: Pillar perches launch poison (poison pools) or fireballs—destroy pillars to stun. Frostwalls trail flights; slow lightning orbs chain strikes to shocked ground; diving slams hit the spawn point.
By 70%: Gliding fire breath scorches trailing burn grounds; tail poison cones litter toxins.
Element | Ability | Avoidance |
|---|---|---|
Cold | Frost Breath/Wall | Sidestep spread |
Fire/Lightning | Gliding Breath/Orbs | Fixed landing spots |
Chaos | Poison Cone | Frontal dodge |
Loot: Chimeral Inscribed Ultimatum—offer at Temple of Chaos for second ascendancy set.
Dodging Blackjaw's Fiery Axe Assault
Jiquani's Machinarium's Blackjaw blends physical and fire. Pushes, wide axe swings, frontal slams, and sweeping flame breaths form the base.
At 65%: Triple slam combos (circle first two, roll last); Leap Slams; axe-flame sweeps.
50% introduces Flame Frenzy: encircling fire, projectiles, ending sweep—outrun or orbit.
Combo | Pattern | Dodge Method |
|---|---|---|
Slam Trio | Delayed finale | Circular run + roll |
Frenzy | Circle + proj | Outrange/orbit |
Reward: Flame Core for permanent +10% Fire Resistance.
Zicoatl's Lightning Maze Mastery
Jiquani's Sanctum guardian Zicoatl wields physical and lightning via serpentine swipes and ground strikes.
Threats: Horizontal lightning walls player-bound; cascading frontal beams; wall-font beams (east/west only); triangular sigil explosions (hug corners safe).
Post-50%: Font-charged grids telegraph lines; circling beams converge centrally (dodge out or through).
Sigil Type | Safe Zone | Phase |
|---|---|---|
Pyramid | Corners | All |
Grid Lines | Avoid paths | 50%+ |
Precise movement unlocks the sanctum.
Racing Mektul Before the Lava Rises
Molten Vault's Mektul demands speed against physical/fire as lava floods. Axe sweeps and double-hits persist.
Leap Slams, hammer overheads anytime. 90%: Hammer ruptures lines of exploding stalagmites (lava-detonated). Seismic Cries burst nearby ones.
80%: Underhand spike sunders. 75%: Lava submersion waves (reduced damage intake), sigil blasts. Repeats waves at 40%.
Hazard | Trigger | Tip |
|---|---|---|
Rupture Line | Hammer charge | Perp dodge |
Lava Waves | Submerge | Burst DPS windows |
Drop: Hammer of Kamasa—deliver to Oswald for Reforging Bench.
Containing Queen of Filth's Toxic Spread
Apex of Filth's Queen unleashes physical/chaos amid exploding mushrooms (chained by steps/attacks). Hammer sweeps, overhead slams, cursed stomps (color-coded: red armor shred, green damage down, purple slow durations), rolling slams, bouncing poison slams, fountain rock tosses.
90%+: Minion summons overwhelm—clear mushrooms proactively.
Curse Ground | Effect | Color |
|---|---|---|
Vulnerability | Armor loss | Red |
Enfeeble | Damage reduction | Green |
Temporal Chains | Duration extension | Purple |
Minion and hazard control wins.
Extinguishing Ketzuli's Solar Onslaught
Temple of Kopec's fire-focused Ketzuli baselines fireballs. Firebolt salvos track movement (strafe linearly); outward lasers; slow exploding orbs; explosive dashes.
80%+: Orbiting Black Hole Suns hijack orbs; edge-spawned orb swarms (collide for mini-holes, more sides low HP).
70%: Tracking Gamma Ray ramps damage. 30%: Second sun orbits inward/opposite.
Orb Mechanic | Behavior | Counter |
|---|---|---|
Standard | Player/edge burst | Sidestep |
Swarm | Collision holes | Predict lines |
Stay unpredictable.
Enduring Viper Napuatzi's Shrinking Arena
Utzaal (Past)'s Viper Napuatzi (physical/chaos/fire/lightning) fights amid shield-bashing soldier walls. Spear phase: sweeps/slams, lunges, splitting lightning throws (reflect off shields), poison serpent waves (dodge thrust), backward poison arc leaps.
Swaps at 90%: Unarmed poison bolts (track/arc), meteor sigils (edge-watch impacts), bouncing explosive snakes, leg poison slams, Spear Hell shrinks arena via guard waves (glow safespots, roll final).
Phase | Weapon | Arena Impact |
|---|---|---|
Spear | Charges/Throws | Stable |
Unarmed | Meteors/Snakes | Shrinking |
Toughest Act 3—prioritize dodges.
Demolishing Doryani's Mech Menace
Black Chambers (Past) hosts two-phase Doryani (physical/cold/fire/lightning).
Phase 1: Right-hand flamethrowers, left lightning arcs, arcing exploding soul gems, clustered soul beams, leaping hybrid slams.
90%+: Central rotating altar beams; touch-activated crystal lightning; edge-bouncing fireballs; tracking lightning tendrils; burning orbs; orb-detonating flameblasts.
45%: Spawns Doryani's Triumph for Phase 2.
Phase 2 (Triumph): Arm slams, head slams, arcing flamethrowers, horizontal ice beams, smashing hybrid explosions.
90%: Grounded flameblasts; charged ice slams.
70%: Sky railgun volleys (dodge charge-ups); clockwise speeding disco lasers (right-side safe).
60%: Doryani detaches (orbits casting flame pillars, lightning storms, tracking giant fist slams); reattaches with tracking bolts. Attached: Inner-safe lightning cages (forked outer damage).
40%: Vaal flamethrowers; hybrid ice-to-lightning bursts (roll behind).
Phase | Form | Ultimate Threats |
|---|---|---|
1 | Humanoid | Altar, Crystals |
2 | Mech/Detached | Fist, Lasers, Cage |
Act closer—save Alva.
FAQs on Path of Exile 2 Act 3 Bosses
What signals a must-dodge attack in Act 3 bosses?
Look for the boss flashing bright red combined with a sharp, urgent audio cue—these indicate unblockable, high-damage moves that demand an immediate dodge roll. Practice timing your roll during the wind-up to position safely afterward, as mistiming can lead to one-shots even on geared characters.
Which Act 3 boss provides a permanent Spirit boost?
Ignagduk, the Bog Witch in The Azak Bog, drops the Gemrot Skull on your first kill. Consuming it grants a permanent +30 maximum Spirit, plus a level 10 Uncut Spirit Gem for socketable buffs. Complete the Tribal Vengeance side quest by delivering Ignagduk's Ghastly Spear to Servi for extra charms.
How do I unlock my second set of ascendancy points?
Defeat Xyclucian, the Chimera in Chimeral Wetlands to obtain the Chimeral Inscribed Ultimatum. Place it in the Temple of Chaos offering font in Act 3—this launches the Trial of Chaos, where succeeding awards your next two ascendancy passives. You can retry failed attempts without losing the item during campaign.
What permanent reward does Blackjaw drop?
Blackjaw, The Remnant in Jiquani's Machinarium drops The Flame Core. Right-click to consume for a permanent +10% to Fire Resistance—crucial for surviving fire-heavy encounters later. Access his arena by powering Stone Altars with Small Soul Cores found nearby.
Is it okay to skip Mektul if I'm undergeared?
Absolutely— the Molten Vault fills with rising lava, turning it into a strict DPS race. If your damage output is low, leave via waypoint and return later (even post-campaign). Victory unlocks The Hammer of Kamasa for Oswald's Reforging Bench, but it's not required for progression.
Why does Viper Napuatzi's arena shrink during the fight?
Her Spear Hell ability empowers the surrounding shield-bearing soldier walls, triggering waves of patterned spear thrusts that progressively contract the safe space. Spot glowing spear tips for safe gaps, stay mobile, and roll-dodge the final sweeping wave—Viper is invulnerable here, so pure survival is key. This is Act 3's toughest test.
How can I safely dodge Doryani's Phase 2 laser attacks?
For the Disco Laser barrage (clockwise rotation from Doryani's Triumph), hug the right side of the starting laser arc to sidestep the speeding pattern. Railgun shots have a visible charge-up—keep circling or roll precisely as it fires downward. In detached mode, prioritize evading the tracking giant fist slam, which slows near impact for last-second dodges.
Do the mushrooms in Queen of Filth's fight chain-explode endlessly?
No, but they chain-react massively if triggered by steps or her attacks—proactively detonate clusters from range to control spawns and avoid getting swarmed. Combine this with dodging color-coded cursed stomps (red: Vulnerability for armor shred; green: Enfeeble for damage down; purple: Temporal Chains for prolonged slows/debuffs) and minion clears post-90% health.
Thanks for Reading
Stay tuned to MMOJUGG for the latest Path of Exile 2 strategies, updates, and Fate of the Vaal League tips!
You may also like: Essential tools, trading helpers, and current meta breakdowns to stay ahead.
Path of Building 2 Guide: Master PoE 2 Builds & Theorycrafting
Top 3 PoE2 Trading Overlays: Best Price Checkers & Trade Tools
PoE 2 Fate of the Vaal Class Ascendancy Meta - Pathfinder & Druids Dominate
Looking for more Path of Exile 2 Guides?
Get exclusive insights into Leagues, Act Bosses, Economy, Crafting and Endgame Progression—all in our comprehensive PoE2 hub.
👉 Visit Our Fate of the Vaal Guide Hub Buy PoE2 Currency
 PoE2 Boosting