WoW SoD Phase 2: Full Gnomeregan Raid Guide
Last updated on February 13, 2024 by MMOJUGG Team | Game: WOW Classic Season Of Discovery Guide |

With WoW SoD Phase 2 now open, top-tier teams have begun assaulting Gnomeregan, and within the first 24 hours of Phase 2 opening, 80 teams have successfully cleared it. While the raid may sound simple, it still poses a specific difficulty for ordinary players.
Today, with MMOJUGG, let's explore how to tackle the bosses of this level 40 raid and what team compositions and tactics to use to increase everyone's chances of success.
For information on the new drops in Gnomeregan, please refer to WoW SoD Phase 2: Gnomeregan Raid Loot (Weapon)," "SoD Phase 2: Gnomeregan Raid Loot (Accessory)," "WoW SoD Phase 2: Gnomeregan Raid Loot (Armor)."
- Team Composition -
1 main tank, preferably with AoE pulling capabilities. 1 off-tank, primarily focused on providing damage, assisting the main tank in clearing debuffs during particular boss fights. 2 healers. 1 class is capable of dispelling diseases. 2 classes are capable of interrupting. The raid features a significant amount of nature and fire damage.
- BOSS Fight Strategy -
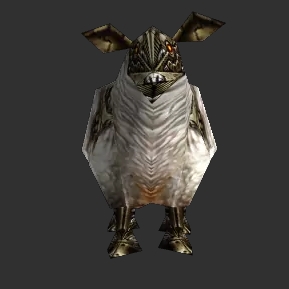
Grubbis - Type: Humanoid - HP: ??? - Level: ??

Key Points:
Focus on handling adds, pull mobs into toxic clouds. Melee players should watch for boss's AOE attacks and interrupt the lizard's petrification ability.Cause of Failure:
Too many toxic clouds or mobs overwhelm the team.Skills Overview:
-Spawn Caverndeep Pillager: Summons Caverndeep mobs.
-Spawn Caverndeep Ambusher: Summons Caverndeep mobs.
-Trogg Rage: Casts in 2 seconds, enrages, unable to target a single enemy. Attack speed and movement speed increased by 100%. Lasts 10 seconds. (Note: Lose aggro, random attacks)
-Grubbis Mad!: Casts in 3 seconds, lasts 5 seconds, CD 15 seconds. Unable to move, deals 402 damage every 1.5 seconds, 8-yard AOE. (Note: Keep away from the boss)
-Irradiated Cloud: Instant cast, targets randomly, 3-yard AOE, deals 92 natural damage, leaves a cloud on the ground, applies Radiation Sickness debuff. Movement speed is reduced by 10%, takes 50% more natural damage, and is dispellable. (Note: Clouds move and instantly kill mobs on contact)
Toxic Vigor: It casts in 3 seconds, lasts 3 seconds, deals 500 AOE damage within 10 yards, and applies a debuff. You smell awful... it lasts for 10 minutes. A radiation surge gives Grubbis infinite power. All damage is increased by 25%.
Preparation:
Off-tank handles adds, initial focus on damage output, later on tanking the lizard. Emphasize on colliding mobs with toxic clouds.Tactics:
There are moving clouds on the field; lead adds into them for instant kills. The clouds disappear afterward. Quickly guide mobs into toxic clouds as they have an AOE effect; more clouds mean more damage to the team. During the boss phase, a lizard pet will join. It has a petrification ability, interruptable within 2 seconds. Failure to interrupt results in an 8-second petrification penalty and loss of aggro, magical debuff dispellable. Off-tank handles this. The boss also randomly charges targets, losing aggro. Melee players, beware of Grubbis Mad! As the battle progresses, two toxic clouds and 2 waves of mobs will appear simultaneously. Ensure timely guidance into the clouds. During the boss phase, mobs primarily target healers, so healers must monitor the toxic cloud's position and promptly guide mobs away.Viscous Fallout - Type: Elemental - HP: ??? - Level: ??

Key Points:
Keep the boss against a wall, prioritize handling mobs, and be ready to dispel.Cause of Failure:
Failure to handle mobs promptly results in widespread radiation burns.Skills Overview:
-Summon Irradiated Goo: Casts in 3 seconds and oozes 3 toxic mobs from the viscous radiation dust.
-Toxic Emission: This is an instant cast that emits ionizing radiation from the radioactive slime, dealing 73 to 77 natural damage to all players every 2 seconds.
-Radiation Burn: This effect casts in 3.5 seconds and spews toxic slime at all players, inflicting 292 to 308 natural damage and an additional 125 natural damage every 3 seconds for the next 15 seconds. It is stackable. This effect is also a debuff, disease, and dispellable. (Note: Interruptible and stunnable)
-Sludge: Instant cast, creates a pool of toxic slime on the ground, inflicting 150 natural damage to players within every 1.5 seconds. Players within the effect have their movement speed reduced by 50%, lasting 5 minutes.
Preparation:
Emphasize slowing, controlling, and interrupting mobs, then find a wall to position against.Tactics:
The area is littered with corpses. Begin near a wall with fewer corpses. The boss continuously casts AOE skills and expands its reach. Tanks should keep the boss against a wall, moving it away from corpses. The boss summons three mobs that automatically seek and fuse with the nearest corpse, transforming into water elementals that cast Radiation Burn. Promptly clearing mobs prevents new fusions and subsequent Radiation burns, rendering the boss essentially immobile. Even if new mobs fuse, remain composed, focusing on stunning and interrupting.Electrocutioner 6000 - Type: Mechanical - HP: ??? - Level: ??

Key Points:
Static Arc operates similarly to Blood Boil. Pay attention!Cause of Failure:
Poor management of Static Arc. Magnetic Pulse explosion of multiple members.Skills Overview:
-Static Arc: Casts in 3.5 seconds, CD 15 seconds. The Electrocutioner 6000 releases a lightning surge towards the farthest target, dealing 975 to 1025 natural damage and bouncing up to 3 times. Each player hit by Static Arc suffers 500% increased damage for 20 seconds. (Similar to Blood Boil, organize two groups to take turns standing far away to absorb this skill.)
-Discombobulation Protocol: Instant cast, the Electrocutioner 6000 releases an electric pulse, dealing 487 to 513 natural damage, and knocks back all players within 100 yards by 9 yards.
-Magnetic Pulse: Instant cast, AOE on a random target, the Electrocutioner 6000 changes the target's polarity, pulling players within 8 yards towards it every 2.5 seconds and dealing 828 to 872 natural damage. Lasts 12 seconds. (Note: Players' sizes will increase. The database indicates 250 milliseconds, likely a typo.)
Preparation:
Arrange positioning.Tactics:
Controlling the boss against a wall is recommended, with DPS classes positioned behind it. Organize two groups to alternately absorb Static Arcs. Players affected by Magnetic Pulse should move to the side of the boss to avoid affecting others when knocked back.Update Feb14, 2024:
Players can no longer out range or use line of sight to prevent the cast or chain effect of Static Arc.Crowd Pummeler 9-60 - Type: Mechanical - HP: ??? - Level: ??

Key Points:
Avoid gears and watch your step.Cause of Failure:
Getting knocked back.Skills Overview:
-Gear Toss: Flying gear causes 251 damage on impact and knockback by 5 yards.
-Gyroscopic Acceleration: Increases attack speed by 5% for 20 seconds.
-Whirlwind Backfire: An uncontrolled whirlwind attacks all nearby enemies, dealing 51% weapon damage every 1.5 seconds within an 8-yard range for 9 seconds. The boss cannot move.
-Gnomeregan Smash: With a 40-yard attack range and a 5-second aiming cast (the boss remains stationary), it strikes in a direction, dealing 462 base damage and knocking back by 15 yards, applying an Off Balanced debuff. Off Balanced: Knockbacks are more effective against you. (Note: Being hit by Smash may result in instant death.)
-The Claw!: A 2-second aiming time, then rushes to grab a target, dealing 501 physical damage in a 2-yard AOE, holding them for 10 seconds, inflicting 201 damage per second. CD 10 seconds.
-Tune Up: Casts for 7 seconds, increasing attack speed by 50%, casting speed by 100%, and movement speed by 60% for 20 seconds.
Preparation:
Pay close attention to your footing.Tactics:
The key is to handle the Gnomeregan Crusher. The boss may pivot, making it challenging to observe its direction. If uncertain, focus on its feet and avoid standing in front of them.The Mechanical Menagerie - Type: Mechanical - HP: ??? - Level: ??

Key Points:
Keep away from sheep, dodge dragon breath, avoid eggs, stay clear of fire pits, and kite the small-sized ones in circles.Cause of Failure:
Melee wipes due to overheating. Tank death.Skills Overview:
STX-04/BD

-Normal Attack: Hits for over 450.
-Sprocketfire Breath: This is a 3-second cast that targets randomly. The caster remains stationary and emits a 45-yard-long flame towards the target, dealing 500 damage per second for 10 seconds.
-Overheat: This two-second cast increases damage taken by 10% and radiates flames to all nearby players, dealing 201 fire damage per second within 8 yards. It lasts for 15 seconds.
-Slag Embers: Inflicts 92 to 108 fire damage per second.
-Widget Fortress: 3-second cast, reduces damage taken by 50% for 30 seconds.
-Self-Repair: This 20-second cast restores 31% HP upon successful completion. (Note: All four bosses must be defeated within 20 seconds.)
STX-13/LL
-Frayed Wiring: This spell has a 3-second cast and electrifies all attackers, dealing 277 natural damage every 15 seconds. (Note: This is similar to the BFD fourth boss's Lightning Shield, but it affects not only sheep, so pay attention to other small creatures as well.)
-Static Fleece: This ability stuns nearby enemies within 8 yards for 1 second every 2 seconds, dealing 175 natural damage.
-Binary Bleat: Silenced by nearby electronic interference for 10 seconds.
-Overheat: This two-second cast increases damage taken by 10% and radiates flames to all nearby players, dealing 201 fire damage per second within 8 yards. It lasts for 15 seconds.
-Widget Fortress: 3-second cast, reduces damage taken by 50% for 30 seconds.
-Self Repair: This 20-second cast restores 31% HP upon successful completion. (Note: All four bosses must be defeated within 20 seconds.)
STX-25/NB

-Normal Attack: Hits for over 325.
-Widget Volley: 2-second cast, deals 656 damage. (Editor's note: Requires interruption.)
-Overheat: This two-second cast increases damage taken by 10% and radiates flames to all nearby players, dealing 201 fire damage per second within 8 yards. It lasts for 15 seconds.
-Widget Fortress: 3-second cast, reduces damage taken by 50% for 30 seconds.
-Nutty Shield: Reduces damage by 24%.
-Self Repair: This 20-second cast restores 31% HP upon successful completion. (Note: All four bosses must be defeated within 20 seconds.)
STX-37/CN

-Normal Attack: Hits for over 500.
-Peck: Inflicts 656 damage.
-Overheat: This two-second cast increases damage taken by 10% and radiates flames to all nearby players, dealing 201 fire damage per second within 8 yards. It lasts for 15 seconds.
-Explosive Egg: Summons an explosive egg.
-Cluck!: 3-second cast, increases attack speed by 50% for 15 seconds.
-Widget Fortress: 3-second cast, reduces damage taken by 50% for 30 seconds.
-Self Repair: This 20-second cast restores 31% HP upon successful completion. (Note: All four bosses must be defeated within 20 seconds.)
Preparation:
Similar to Karazhan's Opera Event. Requires 2 tanks, and one designated for interrupting the Widget Volley.Tactics:
There are 6 red buttons on the field. Pressing one inflicts 31% max HP damage but restores 21% mana/rage/energy. Healing can utilize this to regain mana every 30 seconds.Next, the "Overheat" mechanic is unclear. If the flame generated by the small dragon's backside continues to burn the small animals, it will overheat. The sheep move slowly, have no aggro, and emit silence and stun effects around themselves. Therefore, kite them. But watch out for the raid-wiping skill Frayed Wiring. It's similar to BFD's fourth boss, Lightning Shield, affecting sheep and other small animals. The squirrel's Widget Volley can be interrupted.
The chickens' attacks on tanks are painful, and they lay eggs that explode. It's best to avoid them. The dragon primarily deals with Sprocketfire Breath, which forces the team to move. One tank should attract the dragon and squirrel while the other tank pulls the chicken. Both tanks should kite the bosses on the sidelines. Interrupt the squirrel's abilities. Focus on the dragon's breath direction. Ranged DPS should prioritize sheep and switch to others during the retaliation phase. Keep the health balanced and kill them together.
Update Feb14,2024:
The fight now resets properly if one of the bosses was in self-repair mode when the fight resets.Mekgineer Thermaplugg - Type: Mechanical - HP: ??? - Level: ??

Key Points:
Tank swapping and kiting, handling bombs, arranging machine shutdowns, interrupting toxic gas!Cause of Failure:
Failure to promptly deactivate the machines.Skills Overview:
During Hole Boss Fight:
-High Voltage!: This attack deals 31% MAX HP damage and restores 21% mana/energy/rage. While charging, the buttons seem unresponsive to your touch, granting the debuff and acceleration for 30 seconds.
-Charged: Increases movement speed by 51% for 5 seconds.
Update Feb14,2024:
Thermaplugg's Safe will now spawn under one of the Bomb Dispensers after defeating Mekgineer Thermaplugg.Phase 1
-Normal Attack: Hits for up to 730.
-Sprocketfire Punch: This is an instant cast that deals 875 fire damage to the target and applies a debuff. It deals 251 fire damage every 3 seconds for 30 seconds. (Note: Tank swap is required.)
-Furnace Surge: 2-second cast, randomly targets players, increases movement speed by 8%, spews flames from the mechanical furnace, dealing damage every second for 10 seconds. Players hit will stack Sprocketfire Punch debuff. (Note: Tank swap required.)
-Summon Bomb: Summons an Incendiary Bomb every second, dealing AOE damage within 10 yards, inflicting 437 physical damage, and leaving a ground effect with 251 damage per second for 30 seconds.
Phase 2
-Normal Attack: Hits for up to 730.
-Supercooled Smash: Instant cast, hits within 10 yards, deals 875 frost damage, applies "Freezing" debuff. Within 10 yards, decreases movement speed by 4% per second for 30 seconds, stackable. Freezes at 10 stacks for 30 seconds.
-Coolant Discharge: 3-second cast, AOE within 200 yards, deals 437 frost damage.
-Summon Bomb: This ability summons a Frost Bomb every second and deals 251 frost damage within 20 yards. It also inflicts a freezing trap debuff within 10 yards, decreasing movement speed by 4% per second for 30 seconds, stackable. The bomb freezes at 10 stacks for 30 seconds.
Phase 3
-Hazardous Hammer: Instant cast, AOE within 5 yards, deals 350 nature damage, applies Radiation Sickness debuff. Decreases movement speed by 10%, increases nature damage taken by 50%. Radiation Sickness debuff, dispellable.
-Summon Bomb: Summons a Radioactive Bomb every second, explodes within 10 yards, dealing 218 nature damage.
-Toxic Ventilation: Deals 250 nature damage to the entire area every second. (Note: Interruptible.)
Phase 4
-Sprocketfire Punch: This is an instant cast that deals 875 fire damage to the target and applies a debuff. It deals 251 fire damage every 3 seconds for 30 seconds. (Note: Tank swap is required.)
-Supercooled Smash: Instant cast, hits within 10 yards, deals 875 frost damage, applies "Freezing" debuff. Floor skill, decreases movement speed by 4% per second for 30 seconds, stackable.
-Hazardous Hammer: Instant cast, AOE within 5 yards, deals 350 nature damage, applies Radiation Sickness debuff. Decreases movement speed by 10%, increases nature damage taken by 50%. Radiation Sickness debuff, dispellable.
-Toxic Ventilation: Deals 250 nature damage to the entire area every second. (Note: Interruptible.)
-Summon Bomb: Summons a Radioactive Bomb every second, explodes within 10 yards, dealing 218 nature damage.
Preparation:
Arrange for 1 off-tank. Set up dispels. Six machines are randomly activated on the field, producing bombs every second when active. Assign ranged classes to shut down the machines and handle the bombs.Tactics:
Assign a short cooldown high damage dealer to handle bombs, such as a Warlock's Searing Pain in demon form, significantly reducing the bomb threat. Additionally, healers can press the red buttons every 30 seconds to regain 21% mana without worrying about whether the machines are activated.-Phase 1: Control the boss at the entrance on both sides. Two tanks handle kiting and tank swapping. Machines activate approximately every 15-20 seconds, assigning 2-3 players to shut them down.
-Phase 2: Group AOE, overheal. If tanking freely, one tank is sufficient. Machines activate approximately every 10 seconds; assign 4-6 players to shut them down.
-Phase 3: Interrupt Toxic Ventilation and dispel tank diseases. One tank is sufficient. Machines activate approximately every 10 seconds, so assign 4-6 players to shut them down.
-Phase 4: This is similar to Phase 1, but with an added Freezing debuff and an interrupting Toxic Ventilation. The machine activation interval is the same as Phase 1.
Update 14FEB 2024:Solution to Unable to Close Gnomeregan Electric Fence BUG:
According to players' repeated attempts, there might be a way to shut down the bugged electric fence: after defeating the final boss in Phase 4, the short guy with 8400 hp will descend from the robot. Please don't kill him immediately; wait for him to disable the electric fence before attacking!
UPDATE 27FEB.2024: The increased armor value of certain mechanical bosses in Gnomeregan has been reduced slightly.
Recomment Video about Gnomeregan Raid
That concludes the strategy for the new Gnomeregan. Thank you all for reading.
Season of Discovery Phase 2 is now open, with exciting new raids, profession updates, and PvP activities. Have you prepared your potions and gold? If you need to buy gold, place your order directly on MMOJUGG! For US players, click on WoW SoD Gold, and for EU players, click on WoW SoD Gold EU to place your order. We will provide the best service and fastest delivery speed. Discount code: mmojugg.
Table of Content
 WoW SoD Gold
 WoW SoD Items
 WoW SoD Boosting