- Home
- News & Guides
Arc Raiders Buried City Map Deep Dive & Strategy
Last updated on November 10, 2025 by MMOJUGG Team | Game: ARC Raiders Guide | Tags: Arc Raiders Map Guide

If you've been grinding through the early matches in ARC Raiders, you've likely unlocked Buried City after just six intense rounds. This map stands out as a haunting echo of a bygone era, where crumbling architecture peeks through endless dunes like forgotten memories surfacing after a storm. It's the kind of place that rewards sharp instincts and clever positioning, turning every patrol into a story of narrow escapes and triumphant hauls.
As you dive deeper into these shifting sands, why not make it a habit to pin this page for quick reference during your next session? And if you're gearing up for bigger raids, swing by our ARC Raiders Shop to snag Coins, Weapons, Materials, Blueprints, Loots, or even a Boosting Service—it's the seamless way to elevate your kit without the grind.
A Glimpse into Forgotten Streets
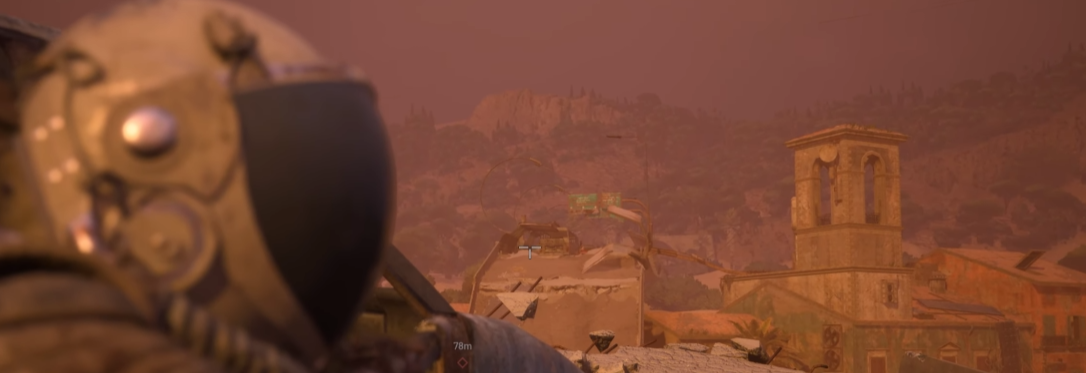
Buried City captures the essence of a once-vibrant settlement, now half-swallowed by the relentless desert that followed the Collapse. Imagine narrow alleys winding between sun-bleached walls, plazas silent except for the whisper of wind-sculpted sand, and rooftops that form natural bridges across the chaos below. This isn't just a battlefield; it's a layered playground where history meets hazard, offering glimpses into pre-apocalypse life through faded murals and buried relics.

The terrain blends open vulnerability with hidden depths. Vast dunes slope gently from the edges, creating natural ramps that let you climb from ground level to elevated perches in moments. But beware—these same slopes expose you to distant eyes, as fresh spawns on the outskirts often gain clear views toward the heart of the action. It's a clever design touch that keeps the high ground contested without feeling unfair, encouraging teams to adapt on the fly rather than dominate from afar.
Rated at a moderate difficulty—three out of five for both standard play and cache uncovers—this map thrives under the cover of night, hitting a full five out of five for those high-stakes nocturnal runs. The ever-moving sands add unpredictability; what was a stable path one minute could shift into a trap the next, forcing you to read the environment as much as your opponents.
Verticality and Flow in the Ruins
What sets Buried City apart is its masterful mix of elevation and enclosure. You'll fluidly transition from low-lying burrow-like structures—where sand seeps through cracked ceilings—to sprawling rooftop networks that spiderweb across the skyline. These heights aren't isolated; they connect seamlessly to street-level skirmishes via crumbling ledges and dune crests, allowing for daring leaps that can turn the tide of a chase.
This vertical freedom fosters dynamic encounters. A squad might hold a rooftop overlook for suppressing fire, only to drop into a shadowed courtyard for close-quarters frenzy. Tight urban corridors channel foes into predictable funnels, but the overhanging dunes provide escape routes or ambush spots. It's this interconnectivity that makes every patrol feel alive—bumping into rivals isn't rare; it's inevitable, with multiple vantage points converging on key chokepoints.
Patience becomes your ally here, as rushing blindly invites crossfire from unseen angles. Instead, use the map's rhythm: observe dune contours for cover, time your ascents to avoid silhouetting against the horizon, and always scan for those subtle roof gaps that scream "flank opportunity."
The Heart of the Highway
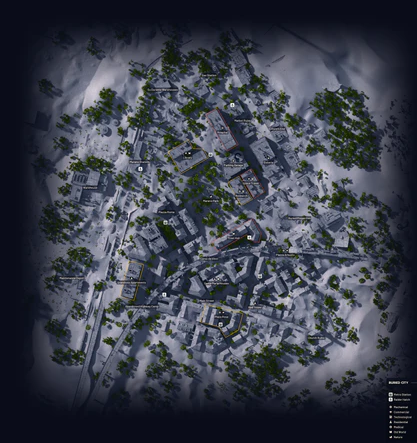
At the map's core pulses a colossal elevated roadway, a relic of hurried evacuations long past, now a magnet for mayhem. This overpass bisects the area, serving as both a shortcut to prime loot zones and a deathtrap for the unwary.
Traversing it exposes you to a gauntlet of threats:
Ground-level ambushes from adjacent buildings
Sniper nests on parallel spans
An increasingly congested sky filled with patrolling drones and rocket-wielding ARC threats
Fights here erupt organically, drawing squads like moths to a flare. You'll see teams funneling toward major points of interest, only to collide in explosive standoffs. The design shines in these moments—advancing feels bold yet risky, with limited retreats that pin you between advancing foes and your own momentum.
Smart plays involve baiting enemies onto the span with feints, then denying their progress with area-denial tools. It's a segment that tests not just aim, but anticipation, rewarding those who read the flow of reinforcements pouring in from the dunes.
Extraction: The Underground Gamble
No map in ARC Raiders nails tension quite like Buried City's unique egress system. Forget surface helipads; here, salvation lies buried in a derelict metro hub, a dimly lit warren of tracks and platforms shrouded in dust.
To escape, delve deep, activate the summon beacon, and hunker down as the ground rumbles with approaching thunder. Surface indicators—flashing beacons piercing the dunes—betray your position, alerting any lurkers to converge.
The real twist unfolds at arrival: the train's doors hiss open on both flanks, potentially flooding your platform with hostiles from the opposite track. One moment, you're extracting in blissful isolation; the next, it's a brutal breakout brawl amid sparks and echoes.
This mechanic enforces calculated risks—you can't force a clash until the last second, buying time for setups but amplifying the chaos of commitment. For solos or under-resourced teams, it's a high-wire act; pack breaching charges or smokes to clear the breach, and always designate a rearguard to watch the far side.
Gear and Gambits for the Grind
Success in these dunes hinges on versatile kits that flex across ranges. The Renegade battle rifle exemplifies this ethos—a reliable mid-to-long arm that punches through close scraps if your trigger finger stays steady.
Attachments like extended magazines boost sustainability without compromising core stats, and here's a pro tip: suppressors in ARC Raiders mute your presence without nibbling at damage output. In a game where audio cues dictate life or death, going quiet is non-negotiable—prioritize silenced options to ghost through engagements, preserving your element of surprise.
Loadouts should mirror the map's duality. For rooftop roamers, lean into scoped rifles and lightweight mobility aids to exploit heights. Close-quarters specialists thrive with shotguns or SMGs, paired with breaching tools for indoor pushes.
Grenades, especially high-yield variants, are map-agnostic must-haves:
Flush dug-in foes
Deny revives
Shatter cover in a pinch
Team composition elevates this further—rotate roles so one holds overwatch while others probe forward, adapting to whether you're contesting open spans or burrowing into bunkers.
Mobility gadgets like ziplines are the unsung heroes of evasion. In heated pinches—say, when multiple squads swarm a contested ridge—they let you bail vertically, turning pursuit into target practice for your squad.
Deploy them preemptively to key ledges, creating rapid reposition chains that outpace foot chases. Remember, overcommitting to a spot invites encirclement; the map's funneling nature means lingering too long summons a storm of reinforcements.
Scavenging Amid the Shifts
Looting in Buried City demands opportunism over obsession. Mid-range knockouts leave bodies tantalizingly out of reach, strewn across exposed dunes or dangling from overpasses, where retrieval invites sniper fire.
Focus instead on environmental windfalls: attuned ears will catch the faint tick of exposed caches—portable stashes brimming with shield upgrades, augment mods, spare rounds, or explosive payloads. These aren't rare; they're reliable boosts that stack your reserves without drawing heat.
Prime hauls cluster around structured hubs like repurposed transit depots or fortified civic remnants, where pre-Collapse artifacts mingle with fresh drops. But the dunes themselves hide survey probes—descending ARC payloads ripe for quick grabs if you time it right.
When loot density spikes post-skirmish, weigh the risk: a zipline hop to a fallen rival might net a blueprint, but if flanks are closing, cut losses and bolt. Extraction keys offer a mercy valve, letting you slip through hidden hatches for a clean exit, loot intact.
It's this selective scavenging that sustains long sessions, turning potential wipeouts into profitable patrols.
FAQs on Arc Raiders Buried City Map
1. How does Buried City's spawn system influence early-game strategies?
Spawns hug the map's perimeter on downward-sloping dunes, granting newcomers elevated sightlines into central rooftops and streets. This balances defender advantages by letting fresh teams contest heights immediately, but it also means early patrols must secure flanks quickly.
To counter, drop toward mid-map cover like low walls or partial burials, then fan out to deny those initial overlooks—teams that control the first 30 seconds often dictate the pace.
2. What's the optimal team composition for handling the highway overpass?
A balanced trio works best:
One dedicated overwatch with a suppressed mid-range rifle to pin advances
A flanker equipped for vertical mobility (ziplines and grenades for denial)
A CQC anchor to hold breaches
Rotate fluidly—use the overpass's linearity to funnel foes into kill zones, but always scout drone patterns first, as aerial threats can shred exposed pushes. This setup maximizes the span's offensive potential while mitigating its vulnerability to swarms.
3. Why do silencers matter more in Buried City than other maps?
The map's dense interconnectivity amplifies sound propagation—echoes bounce off buried facades and dune hollows, betraying positions across multiple layers. Silencers preserve full damage while cloaking your shots, letting you pick off dune-crossers or rooftop lurkers without alerting reinforcements.
Pair with audio-minimizing perks for "ghost runs," where you harvest caches undetected, turning the urban maze into your silent domain.
4. How can ziplines turn a losing pinch into a tactical retreat?
In encirclement scenarios—like three squads converging on a ridge—ziplines create asymmetric escapes. Anchor one to a neutral rooftop or dune crest, then smoke the line to draw fire while your team zips over.
Pursuers must either chase on foot (buying distance) or follow your cable (exposing them to enfilade shots). Stock extras; chaining two or three forms a mobile fallback network, preserving health and loot for counterattacks elsewhere.
5. Are raider caches worth the risk in high-contest zones?
Absolutely, but context is key—their ticking alert draws rivals, so prioritize isolated ones near extractions. Yields like blue/green shields or augments provide mid-run pivots, often outweighing the exposure.
Scan with heartbeat sensors pre-loot, and pair with a spotter; in low-traffic dunes, they're free upgrades, but near the highway, treat them as bait for ambushes on greedy scavengers.
Thanks for Reading
Buried City's blend of buried beauty and brutal tactics makes it a standout in ARC Raiders' roster—master it, and you'll turn every dune into a dominion. Keep following MMOJUGG for more breakdowns that keep you one step ahead in the apocalypse.
You Might Also Like:
ARC Raiders Buried City Map Deep Dive Strategy – Snowy loot paths
ARC Raiders Cold Snap Buried City Puzzle Guide – Winter puzzle solutions
ARC Raiders Spaceport Map Loot Key Locations – Blizzard POI hotspots
Mastering Dam Battlegrounds Map in ARC Raiders – Frozen lake navigation
ARC Raiders The Blue Gate Map Mastery Guide – Valley condition adaptations
ARC Raiders Map Modifier Condition Mastery Guide – Hourly cycle strategies
Want more ARC Raiders guides?
Dive deeper into blueprints, materials, weapons, maps, and the latest patch updates—all in one place.
👉 Visit Our ARC Raiders Guide Hub Buy ARC Raiders Items
 Buy ARC Raiders Coins
 Buy ARC Raiders Boosting