Master Lira Vaal: PoE2 Temple of Atziri Full Guide
Last updated on December 31, 2025 by MMOJUGG Team | Game: Path of Exile 2 Guide | Tags: Fate of the Vaal

Path of Exile 2's 0.4.0 update, The Last of the Druids, brings the Fate of the Vaal league with its centerpiece: Lira Vaal, the sprawling Temple of Atziri. This modular dungeon lets you shape every encounter, balancing risk against massive payoffs like enhanced gear and rare currencies. Whether you're chasing god-tier implicits or just farming efficiently, understanding this system turns chaotic runs into profitable powerhouses.
While you're planning your first temple dive, bookmark this guide to keep all the strategies at your fingertips. For a smoother start, check out our Path of Exile 2 Item Shop for Divine Orbs, Exalted Orbs, crafting currency, rare items, uniques, and beyond to supercharge your builds without the grind.
Activating Portals to Lira Vaal
Vaal Beacons pulse with corrupting energy, scattered across Wraeclast's zones, twisting nearby foes into tougher variants. These structures demand blood: clear out every afflicted monster around a beacon to charge it fully. Stack six charged beacons in one area, and a shimmering portal rips open, pulling you into Atziri's ancient domain.
![]()
In early game, this feels straightforward, but endgame players can preload up to 10 temples via stacked beacons, chaining runs for non-stop progression. Pro tip: Prioritize zones with dense packs to speed up charging—your build's clear speed dictates how quickly you scale. (You may also be interested in: Complete Timeline from Exploit to Hotfix: PoE2 Holten Vaal Temple Farm)
Shaping Your Dungeon Layout
Step through the portal, and the Temple Console greets you: a vast grid layout with Atziri's chambers lurking at the far end. Each visit provides six new rooms, plus connector halls/paths. Drag and drop them strategically—halls link sections for fluid navigation, while rooms pack the action: monster dens, reward vaults, or crafting hubs.

Commit your design, enter, and clear sequentially. Poor paths lead to dead ends or skipped loot; smart ones funnel you toward high-value targets. Post-run, decay hits: random rooms crumble, forcing rebuilds. This persistence means your temple evolves visit by visit, growing denser and deadlier if you play it right.
Layout Element | Purpose | Placement Tip |
|---|---|---|
Halls/Paths | Connect rooms for access | Chain linearly to boss or loop for safety |
Basic Rooms | Monsters, minor loot | Buffer tough upgrades early in path |
Reward Rooms | Currency/gear drops | End of safe segments |
Support Rooms | Enable upgrades | Adjacent to targets (game highlights greens) |
How to Build a Perfect Temple
Update Dec 31: Craft a "snake chain"—one (or two) linear paths from entrance, locked at the tip. Decay only nibbles the end; locks preserve the rest. Aim for 50-60 raw divines/run with optimization. Using Tool for testing your layout: Atziri Temple Monitor

Core Rules:
Never loop: Closes the chain—total collapse.
Avoid squares: Deletes locked sections.
Frontload Spies: Commanders block further Spy Masters post-placement.
Priority Rooms | Boost | Target Count |
|---|---|---|
Spy Master | Rares; 30% mod amp (Garrison/Armory); locks | 13-17 |
Armory (T3) | Humanoid quant (new "quant + life/exp") | 8+ |
Alchemy Lab (T3) | Rarity (currency too) | 6+ |
Corruption Chamber | +Rare mods (multiplicative) | 4-5 |
Start Strong: Spy Master → Garrison (easy locks via medallions). Or Corruption Chamber (optimal, but lock-starved early). Single chain until 7-8 Spies; add second then.
Early Survival: Spam "fodder" (junk rooms/paths) down the middle. Decay prefers isolated ends—protects your snake 80%+ of runs.
Architect Play: Ideal spots: Dead center, top-right, or top-left. Connect one room only. Force spawn: Fill undesired areas first (won't overlap owned tiles).
Pro Tech - Russian Snake: Infinite Garrison → Spy: Insert Armory → Garrison → Spy. Lock Spy; destroy inserts. Corner variant needs 2 locks.
Spy Master Power: T3 via "assassination"—run unprotected extras first (empty on enter). One end-Spy upgrades multiples. Outvalues extra Armory (amps 60%+ effectiveness).
Application: Mimic planners (Atziri tool). 2-3 open ends max. Upgrade via medallions/assassinate. 2-3M DPS + Hunter's Haste clears 15-20M HP rares.
Expert Insight: Risk—corner loops trigger bugged full-chain wipes (patch-pending). Optimal path: Scatter 5+ fodder ends; boosts survival to 1-in-11 odds per decay.
Crystal Sustain (Post-Hotfix): T15 6-mod via Grand Project towers. Light radius stack + Temporal's Chains: Spot beacons in 20-30s (2 crystals/map). Rush, portal—skip boss.
Vaal Temple Crafting Stations Intro
Deep within Lira Vaal's upgraded rooms—primarily Tier 3 Corruption Chambers, Smithies, Thaumaturge labs, and Sacrificial altars—you'll find these 17 specialized crafting benches. They enable double corrupts, quality pushes beyond 20%, Unique rerolls, and more, supercharging your gear with Vaal twists. Many carry destruction risks, so target bricks wisely for god-rolls that dominate trade and builds.
Crafting Station | Effect |
|---|---|
Corruption Instiller | Unpredictably modifies corrupted equipment or jewels (risk of destruction). |
Gem Corrupter | Unpredictably modifies corrupted skill gems (risk of destruction). |
Soul Core Infuser | Unpredictably modifies a Soul Core (chance to destroy). |
Corrupted Precursor Machine | Unpredictably modifies a Precursor Tablet (chance to destroy). |
Morphology Mechanism | Replaces up to 2 modifiers on corrupted Vaal Uniques; converts other Uniques to corrupted versions of the same class. |
Forging Workbench | Greatly improves quality on martial weapons, caster weapons, or armour. |
Forging Mechanism | Adds an Augment Socket to martial weapons, wands, staves, or armour. |
Masterwork Forge | Improves quality above 20% on martial/caster weapons or armour (chance to corrupt). |
Triumphant Forge | Improves quality above 20% on martial/caster weapons or armour (chance to corrupt). |
Extraction Workbench | Destroys equipment, returning socketed Augments/Soul Cores. |
Gemcutting Workbench | Sets a skill gem to have 3 support gem sockets. |
Gemcutting Mechanism | Greatly improves quality of a skill gem. |
Corruption Altar | Unpredictably modifies an item and corrupts it. |
Exalted Workbench | Augments a rare equipment item with a new random modifier. |
Regal Workbench | Upgrades a magic equipment item to rare, adding 1 modifier. |
Alchemy Workbench | Upgrades normal or magic equipment to rare with 4 random modifiers. |
Complete Overview of All Vaal Temple Rooms
Below is a comprehensive breakdown of every room available in Path of Exile 2 Lira Vaal (Temple of Atziri) from the Fate of the Vaal league. Rooms are grouped by category for easier navigation, with details on tier progression, upgrade requirements, and key effects/rewards.
Path Rooms
Room Name | Tier | Upgraded By | Description |
|---|---|---|---|
Path | 1 | - | Basic connector hallway; grants +40% hidden chest amount on the map. |
Garrison Rooms
Room Name | Tier | Upgraded By | Description |
|---|---|---|---|
Guardhouse | 1 | Commander, Armoury | Monster-focused room; may contain equipment modification bench; +10% monster packs. |
Barracks | 2 | Commander, Armoury | Stronger packs; may contain bench; +10% packs, normal monsters +8% effectiveness. |
Hall of War | 3 | Commander, Armoury | High-density garrison; may contain bench; +10% packs, normal monsters +16% effectiveness. |
Commander Rooms
Room Name | Tier | Upgraded By | Description |
|---|---|---|---|
Commander's Chamber | 1 | Garrison ×3 or Transcendent Barracks ×3 | Chance for Uromoti's Medallion (increases with tier); may contain bench; rare monsters +8% effectiveness. |
Commander's Hall | 2 | Garrison ×3 or Transcendent Barracks ×3 | Higher medallion chance; may contain bench; rares +15% effectiveness. |
Commander's Headquarters | 3 | Garrison ×3 or Transcendent Barracks ×3 | Highest medallion chance; may contain bench; rares +30% effectiveness. |
Armoury Rooms
Room Name | Tier | Upgraded By | Description |
|---|---|---|---|
Depot | 1 | Smithy, Alchemy Lab | Contains equipment drops; humanoid monsters +8% effectiveness. |
Arsenal | 2 | Smithy, Alchemy Lab | Many equipment pieces; humanoids +15% effectiveness. |
Gallery | 3 | Smithy, Alchemy Lab | Rare equipment drops; humanoids +30% effectiveness. |
Smithy Rooms
Room Name | Tier | Upgraded By | Description |
|---|---|---|---|
Bronzeworks | 1 | Golem Works | Quality improvement bench (Tier 3 allows >20%); chests +8% item rarity. |
Chamber of Iron | 2 | Golem Works | Quality + augment socket bench (Tier 3 >20%); chests +15% rarity. |
Golden Forge | 3 | Golem Works | Advanced quality bench (>20%); chests +30% rarity. |
Generator Rooms
Room Name | Tier | Upgraded By | Description |
|---|---|---|---|
Dynamo | 1 | Thaumaturge, Sacrificial Chamber | Powers nearby rooms (range increases per tier); may contain bench; constructs +8% effectiveness. |
Shrine of Empowerment | 2 | Thaumaturge, Sacrificial Chamber | Expanded power range; may contain bench; constructs +15% effectiveness. |
Solar Nexus | 3 | Thaumaturge, Sacrificial Chamber | Maximum power range; may contain bench; constructs +30% effectiveness. |
Spymaster Rooms
Room Name | Tier | Upgraded By | Description |
|---|---|---|---|
Spymaster's Study | 1 | - | Chance for Juatalotli's Medallion (increases per tier); can assassinate rival Spymasters to level up. |
Hall of Shadows | 2 | - | Higher medallion chance; assassination option. |
Omnipresent Panopticon | 3 | - | High medallion chance; assassination option. |
Legion Barracks Rooms
Room Name | Tier | Upgraded By | Description |
|---|---|---|---|
Viper's Loyals | 2 | Armoury, Spymaster | +15% rare monsters. |
Elite Legion | 3 | Armoury, Spymaster | +30% rare monsters. |
Synthflesh Lab Rooms
Room Name | Tier | Upgraded By | Description |
|---|---|---|---|
Prosthetic Research | 1 | Flesh Surgeon | Monsters grant +5% experience. |
Synthflesh Sanctum | 2 | Flesh Surgeon | Monsters grant +10% experience. |
Crucible of Transcendence | 3 | Flesh Surgeon | Monsters grant +20% experience. |
Flesh Surgeon Rooms
Room Name | Tier | Upgraded By | Description |
|---|---|---|---|
Surgeon's Ward | 1 | Synthflesh Lab | Tier 3 enables limb modification; uniques +5% effectiveness. |
Surgeon's Theatre | 2 | Synthflesh Lab | Tier 3 limb modification; uniques +10% effectiveness. |
Surgeon's Symphony | 3 | Synthflesh Lab | Contains limb modification device; uniques +20% effectiveness. |
Transcension Device Limb Mods
The Transcension Device, accessible in Tier 3 Flesh Surgeon rooms like Surgeon's Symphony, lets you swap your character's arms or legs for Vaal-engineered prosthetics. Each replacement randomly grants one of six powerful mods per limb type, delivering tailored boosts for defenses, speed, or utility—perfect for pinnacle content. These augments vanish on death, so plan revisits strategically for sustained power.
Leg Prosthetics
ID | Roll Range | Effect | Tags |
|---|---|---|---|
IncursionLeg1 | (20–30)% | increased Evasion Rating | Defences |
IncursionLeg2 | (6–10)% | increased Movement Speed while Sprinting | Speed |
IncursionLeg3 | (15–25)% | increased Stun Threshold | - |
IncursionLeg4 | (5–10)% | reduced Movement Speed Penalty from using Skills while moving | Speed |
IncursionLeg5 | (20–30)% | increased Mana Regeneration Rate while moving | Mana |
IncursionLeg6 | (6–10)% | of Damage taken Recouped as Life | Life |
Arm Prosthetics
ID | Roll Range | Effect | Tags |
|---|---|---|---|
IncursionArm1 | (8–12)% | increased Block Chance | Block |
IncursionArm2 | (6–10)% | increased Attack Speed | Attack Speed |
IncursionArm3 | (6–10)% | increased Cast Speed | Cast Speed |
IncursionArm4 | (12–16)% | increased Curse Magnitudes | Curse |
IncursionArm5 | (6–10)% | increased Deflection Rating | Defences |
IncursionArm6 | (15–25)% | increased Presence (Area of Effect) | Area of Effect |
Transcendent Barracks Rooms
Room Name | Tier | Upgraded By | Description |
|---|---|---|---|
Steelflesh Quarters | 2 | Synthflesh Lab | +15% magic monsters. |
Collective Legion | 3 | Synthflesh Lab | +30% magic monsters. |
Alchemy Lab Rooms
Room Name | Tier | Upgraded By | Description |
|---|---|---|---|
Chamber of Souls | 1 | Thaumaturge ×2 | Tier 3 enables Soul Core corruption; +8% item rarity from monsters. |
Core Machinarium | 2 | Thaumaturge ×2 | Tier 3 Soul Core corruption; +15% rarity. |
Grand Phylactory | 3 | Thaumaturge ×2 | Device to corrupt Soul Cores (room destabilizes after use); +30% rarity. |
Thaumaturge Rooms
Room Name | Tier | Upgraded By | Description |
|---|---|---|---|
Thaumaturge's Laboratory | 1 | Sacrificial Chamber | Device to add 3 support sockets to gems (Tier 3 further corruption). |
Thaumaturge's Cuttery | 2 | Sacrificial Chamber | Improves skill gem quality (Tier 3 further corruption). |
Thaumaturge's Cathedral | 3 | Sacrificial Chamber | Further gem corruption device (room destabilizes after use). |
Golem Works Rooms
Room Name | Tier | Upgraded By | Description |
|---|---|---|---|
Workshop | 1 | - | Tier 3 high chance for Quipolatl's Medallion; may contain bench. |
Automaton Lab | 2 | - | Tier 3 high medallion chance; may contain bench. |
Stone Legion | 3 | - | Highest medallion chance; may contain bench. |
Corruption Chamber Rooms
Room Name | Tier | Upgraded By | Description |
|---|---|---|---|
Crimson Hall | 1 | Thaumaturge, Sacrificial Chamber | Item corruption device (Tier 3 further equipment corruption); rares 8% extra modifier chance. |
Catalyst of Corruption | 2 | Thaumaturge, Sacrificial Chamber | Item corruption (Tier 3 further); rares 15% extra modifier. |
Locus of Corruption | 3 | Thaumaturge, Sacrificial Chamber | Further equipment corruption device (room destabilizes after use); rares 30% extra modifier. |
Treasure & Sacrificial Rooms
Room Name | Tier | Upgraded By | Description |
|---|---|---|---|
Sealed Vault | 1 | - | Contains many chests; destabilizes once central vault opened. |
Altar of Sacrifice | 1 | - | Contains unique item (Tier 3 Vaal Unique modification); +8% rare chests. |
Hall of Offerings | 2 | - | Unique item (Tier 3 modification); +15% rare chests. |
Apex of Oblation | 3 | - | Vaal Unique modification device (destabilizes after use); +30% rare chests. |
Special Chambers & Vaults
Room Name | Tier | Category | Description |
|---|---|---|---|
Architect's Chamber | 1 | Architect's Chamber | Defeat the Royal Architect to select rewarding vaults; high chance for Xopec and Azcapa's Medallions. |
Foyer | 1 | Entrance | Temple entrance area. |
Kishara's Vault | 1 | Currency Vault | Large currency stash; destabilizes once cleared. |
Vault of Reverence | 1 | Lineage Gems Vault | Random Lineage Support gem; destabilizes once cleared. |
Jiquani's Vault | 1 | Augments Vault | High-level Rune; destabilizes once cleared. |
Tablet Research Vault | 1 | Tablets Vault | Tablet corruption device; destabilizes once cleared. |
Ancient Reliquary Vault | 1 | Uniques Vault | Unique item; destabilizes once cleared. |
Royal Access Chamber | 1 | Royal Access | Grants access to Atziri's Chamber; destabilizes once used. |
Extraction Chamber | 1 | Extraction | Device to salvage socketed augments/Soul Cores; destabilizes once cleared. |
Sacrifice Room | 1 | Upgrade | Sacrifice this room to upgrade a Sacrificial Chamber. |
Atziri's Chamber | 1 | Atziri's Chamber | Pinnacle boss encounter with Queen Atziri. |
Unlocking Room Power Through Synergies
Raw placement is step one; true might comes from tiers. Hover a room, and the console glows green on compatible neighbors—like positioning a Golem Works next to a Smithy for automated buffs. Upgrade to Tier 3, and temple-wide modifiers kick in: faster monsters, richer drops, or global crafting access. But balance is key—over-upgrading spikes difficulty, potentially stranding you before the end.
Tier 3 rooms often house game-changers, like devices spitting tradeable orbs. Experiment early: a single synergy can multiply loot by orders of magnitude.
Tier 3 Room | Core Function | Upgrade Requirements | Temple Impact |
|---|---|---|---|
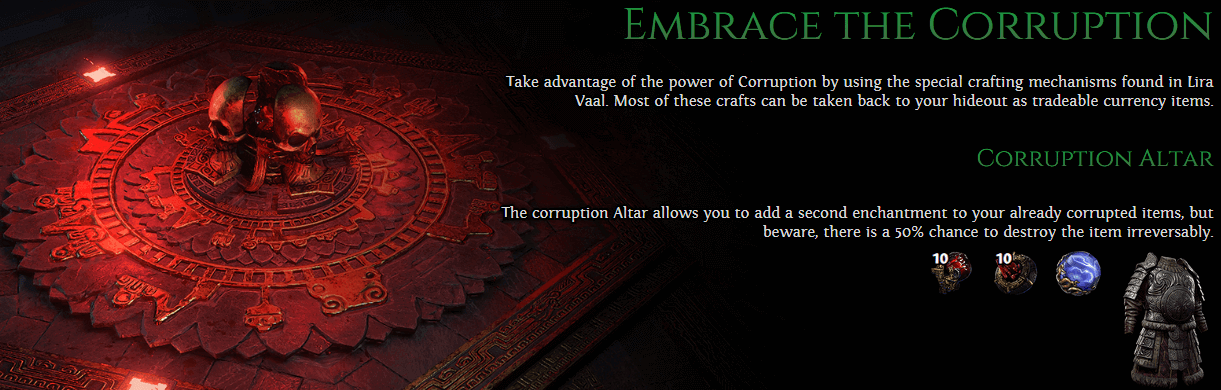
Corruption Altar | Second corrupt on corrupted items (50% shatter risk) | Adjacent corruption supports | Global corruption chance boost |
Transcension Device | Swap limbs for Vaal augments (die = lose) | Mechanical precursors nearby | Persistent buffs if undying |
Juatalotli's Triumph | Reroll Vaal Unique mods or convert others | Sacrifice altars | Wild Unique upgrades |
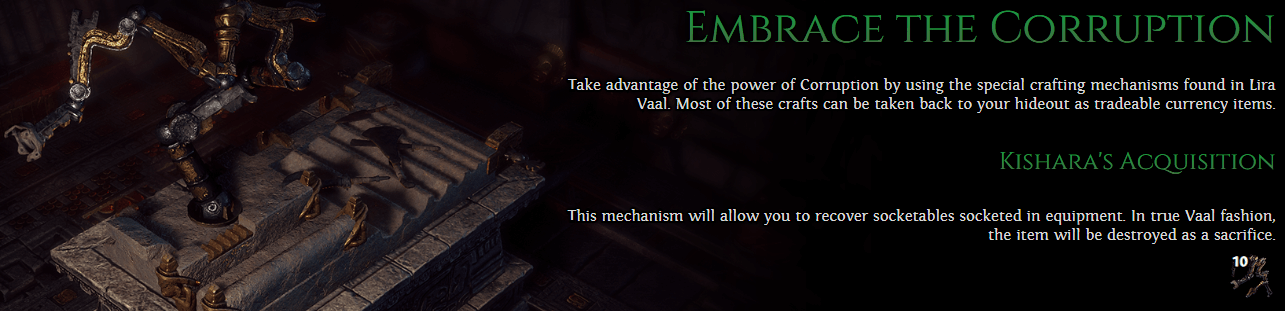
Kishara's Acquisition | Extract socketables from gear | Destruction hubs | Recover valuables |
Corrupted Precursor Machine | Extra Tablet mods/uses | Infusion labs | Mapping power surge |
Jiquani's Triumph | Remix Soul Cores | Core labs | Custom implicits |
Elevating Gear with Double Corruption
Corruption shines here: basic altars twist fresh items, but Tier 3 lets you gamble twice-corrupts on pre-tainted gear. That 50/50 destroy chance? Offset by Vaal blessings—extra implicits, mod swaps, or implicit overhauls. Pair with Crystallized Corruption orbs for safer rolls outside.
Vaal Tablets get corrupted too, stacking uses or mods for brutal maps. Risk scales reward: a solid hit turns mediocre uniques into league-defining monsters.
Corruption Type | Risk Level | Potential Gain |
|---|---|---|
Single Corrupt | Low (standard) | New implicit/mod |
Double Corrupt | High (50% destroy) | Vaal blessing + extras |
Tablet Corrupt | Medium | +Uses or mods |
Unique Reroll | Variable | Fresh Vaal rolls |
Defeating Xipocado: Gateway to Atziri's Throne
Carve a deliberate path through your evolving temple layout, prioritizing synergies that unlock deeper chambers in the time-warped Lira Vaal—the past-era version accessed via the entrance's prototype portal. This positions Xipocado, the Royal Architect, as the ultimate mid-boss guardian, depicted with his iconic helmeted silhouette. His chamber demands precise pathing: connect halls sequentially, upgrade flanking rooms for buffs, and ensure no dead ends block progress. The fight pits you against his devoted followers and Vaal constructs, ramping with temple modifiers like empowered commanders or golem swarms from adjacent upgrades.
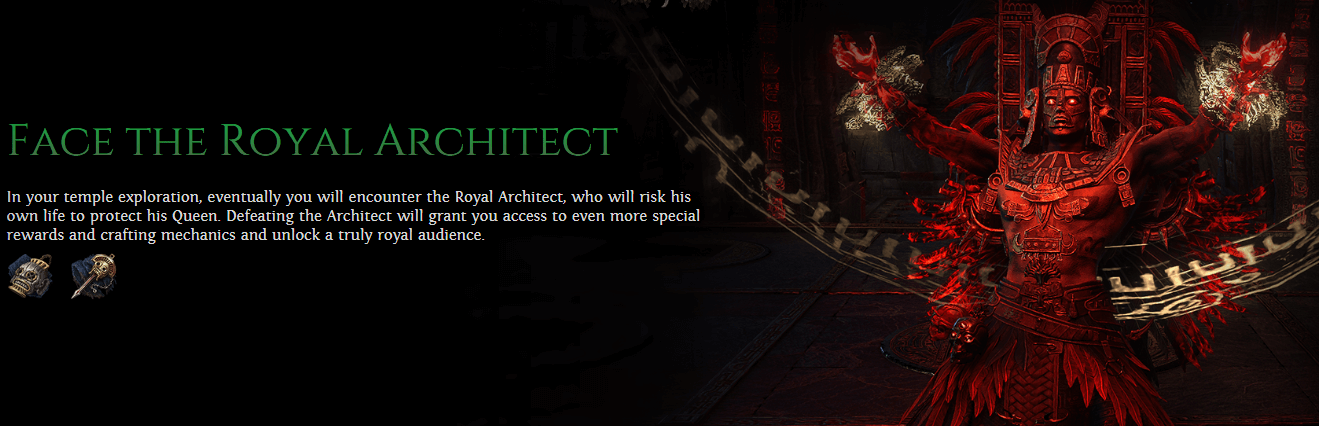
Triumph yields immediate elite rewards—new unique items, Lineage Support gems for skill customization, and Xipocado's Console, a premium tool to spawn the Royal Access Chamber. This pivotal room acts as the key: interact with it to unseal Atziri's distant throne room, even if directly pathed. However, victory triggers catastrophic decay—dozens of rooms crumble, resetting your layout and forcing a full rebuild from a skeletal frame. The trade-off? Access to pinnacle content and tradeable loot that fuels economy-dominating crafts.
Leverage the time portal for efficiency: warp directly to the Architect's domain or high-value spots post-rebuild, bypassing early grind for targeted farms. Early-league tip: Farm pre-stacked beacons (up to 10) to chain runs, minimizing rebuild downtime while scaling your build.
Phase | Strategy | Key Rewards |
|---|---|---|
Pathing to Chamber | Linear halls + Tier 2/3 buffers (e.g., Sacrificial Rooms for energy) | Layout persistence |
Boss Encounter | Dodge follower adds; burst phases with portal skips | Uniques, Lineage Supports |
Post-Victory | Activate Console immediately; extract valuables pre-decay | Royal Access Chamber unlock |
Rebuild | Prioritize 6 new rooms toward Atziri | Economy orbs from decayed crafts |
Vaal Medallions Overview
Medallions are elite drops from temple bosses like Commanders (Uromoti's), Spymasters (Juatalotli's), Golem Works (Quipolatl's), and the Royal Architect (Xopec's, Azcapa's). They provide game-changing consumables to stabilize layouts, boost tiers, expand slots, or enhance post-boss loot—essential for scaling your temple toward Atziri.
Medallion | Effect | Lore |
|---|---|---|
Juatalotli's Medallion | Prevents the next destabilization of a room | The Architect gathered Vaal history to preserve it; she allowed it for her own ends. |
Hayoxi's Medallion | Reroll the reward of a Reward Vault | The Architect of Destruction met his end in an explosion; reassembled and transcended. |
Quipolatl's Medallion | Improves the tier of a room | The Nexus Architect prototyped the temple, building her another throne. |
Uromoti's Medallion | Adds a room | The Expansion Architect worked afar; his daughter ensured his focus. |
Xopec's Medallion | Increases maximum Crystal capacity | The Power Architect sought mental freedom; she pursued even there. |
Azcapa's Medallion | Increases maximum Medallion capacity | The Guild Architect supplied trinkets; she barely noticed. |
Estazunti's Medallion | Places an extra Reward Vault after defeating the Architect | The Vault Architect begged nobles to halt treasures; his task was endless. |
Claiming Victory Over Queen Atziri
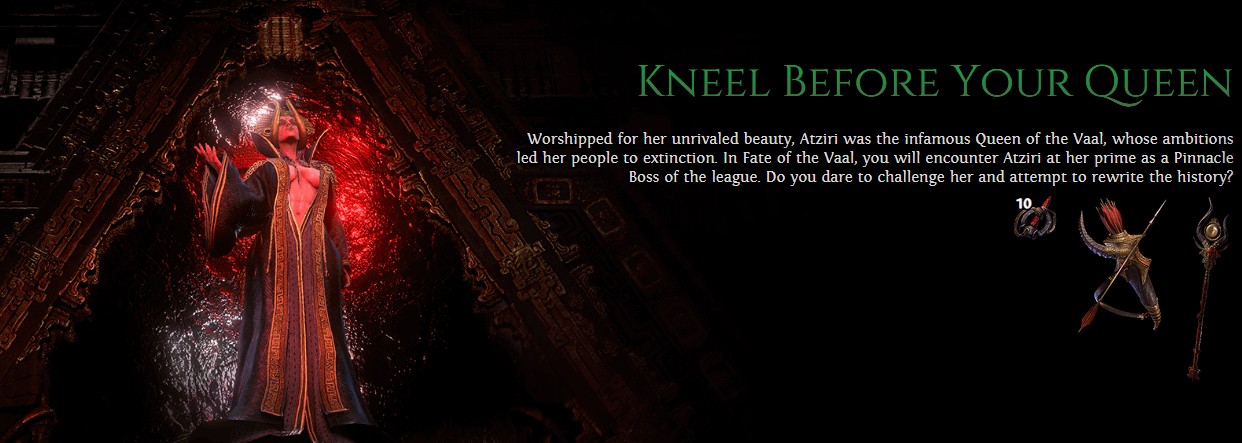
At the temple's heart: Atziri at her zenith, a revamped pinnacle boss weaving Beast-fueled assaults. Survive her phases—projectile storms, summons, corrupting pools—and reap: a unique staff amplifying corrupted gems with projectile splits, Vaal Siphoners for kill-gated ring/amulet buffs, plus lineage supports and crafting deluges. Her defeat demands perfect layouts; botch it, and rebuild from scratch.
Atziri Reward | Effect | Acquisition |
|---|---|---|
Unique Staff | Boosts corrupted gems, splits shots | Direct drop |
Vaal Siphoner | Kill threshold amps mods | Boss loot |
High-Tier Orbs | Architect's, Cultivation, etc. | Chambers |
Unlocking Gear Potential with Soul Cores
Soul Cores stand as Vaal-engineered masterpieces—elite socketables that eclipse standard runes, delivering exclusive Chaos-born modifiers like enhanced ailment buildup, life recovery on kill, or elemental penetration. Socket them into rune-enabled gear (weapons/armor) via empty sockets added by Artificer's Orbs or risky Vaal Orb corrupts, transforming baseline items into build-defining powerhouses with implicit-like boosts unattainable elsewhere.

The temple revolutionizes their lifecycle: Harvest corrupted variants from Tier 3 Alchemy Labs by toppling Vaal construct bosses amid hazardous labs—high monster density demands clear-speed optimization. Extract them risk-free via Kishara's Acquisition (Tier 3 room), using the Orb of Extraction to pulverize junk gear and reclaim cores without loss, a godsend in currency-tight metas. Remix for god-rolls in Jiquani's Triumph: the Core Destabiliser unpredictably mutates cores into superior "corrupted" forms, potentially birthing league-exclusive mods like amplified ignites or shock thresholds—pure RNG heaven for traders and min-maxers.
Synergize rooms for max output: Flank Alchemy Labs with generators and golem works for auto-upgrades, then funnel to extraction hubs. Always pull cores before corrupts or salvages—reuse slashes acquisition costs, letting you hot-swap for bossing (e.g., Tacati's Poison for DoT) or mapping (Jiquani's Life Recovery). Tradeable as drops or orbs, they fuel the market; stockpile for mirror-tier flips.
Core Example | Weapon Mod | Armor Mod | Acquisition Tip |
|---|---|---|---|
Tacati | 15% Poison on Hit | +7% Chaos Res | Alchemy Lab T3 |
Jiquani | 2% Life on Kill | +2% Max Life | Destabiliser remix |
Citaqualotl | +30% Ele Dmg Attacks | +5% All Ele Res | Extract from rares |
Puhuarte | +30% Ignite Chance | +1% Max Fire Res | Vaal construct drops |
FAQs on Path of Exile 2 Temple of Vaal
How do I unlock and enter Lira Vaal for the first time?
Hunt Vaal Beacons scattered in maps—these corrupt nearby monsters into tougher versions. Fully charge 6 beacons in one zone by killing all affected enemies around each to open the portal. Endgame, stack up to 10 for chained runs without downtime.
What's the best beginner layout to reach the Royal Architect quickly?
Start linear: Path → Guardhouse (buffer) → Dynamo (power) → Crimson Hall (basic corrupt) → Path → Architect's Chamber. Upgrade Dynamo with Thaumaturge early for synergies—keeps difficulty low while building toward Xipocado.
Which rooms enable double corruption on gear and gems?
Tier 3 Corruption Chambers (Locus of Corruption) for 50% destroy-risk second corrupts on tainted items/jewels. Thaumaturge's Cathedral for gems. Always flank with Sacrificial Chamber and Thaumaturge for access—room destabilizes post-use.
How do Flesh Surgeon limb prosthetics work, and which are must-haves?
In Tier 3 Surgeon's Symphony, swap arms/legs for random Vaal mods (e.g., 20-30% Evasion legs or 6-10% Attack Speed arms). They vanish on death—revisit to refresh. Prioritize IncursionLeg6 (damage recoup as life) for survivability or IncursionArm4 (curse magnitude) for casters.
Where do I farm Medallions, and how do I use them effectively?
Commanders drop Uromoti's (add room), Spymasters Juatalotli's (prevent destabilize), Golem Works Quipolatl's (tier up). Xipocado yields Xopec's/Azcapa's (crystal/medallion caps). Use Quipolatl's on Corruption Chambers first for max rewards; save Juatalotli's for post-boss decay.
How can I extract and remix Soul Cores for god-roll implicits?
Farm corrupted cores from Tier 3 Grand Phylactory (Alchemy Lab bosses). Extract via Extraction Chamber/Kishara's Acquisition without loss. Remix in Jiquani's Triumph (destabilizer) for Vaal upgrades like 2% life on kill. Socket into rune-enabled gear—trade hot.
What's the strategy to beat Xipocado, the Royal Architect?
Path linearly with Tier 2+ buffers (e.g., Barracks for packs). Burst his adds and constructs during empowered phases from nearby Generators. Win unlocks Royal Access + vaults (currency, Lineage gems). Expect heavy decay—teleport-skip early rooms next run.
How do I prepare my build for Atziri's pinnacle fight?
Cap 30%+ fire/lightning res (her phases ramp with temple greed). Optimize Tier 3 paths: Corruption for double-tainted uniques, Surgeon for limbs. Staff drop splits projectiles on corrupted gems—test mapping first. Layout must reach her via Architect.
Can I trade temple rewards, and what's most profitable?
Yes—all currencies (Architect's Orbs, Vaal Cultivation), Soul Cores, Medallions, Lineage Supports are fully tradeable. Flip double-corrupted uniques or remixed cores early league; vaults like Kishara's (currency) and Jiquani's (runes) yield market movers.
What are common mistakes that brick my temple runs?
Over-greeding Tier 3 without buffers leads to dead ends/unwinnable mods. Ignoring green synergy highlights wastes upgrades. Don't corrupt pre-extracted cores or valuables without backups—50% shatters add up. Always preview full path pre-commit.
Thanks for Reading
Lira Vaal redefines crafting and farming in Path of Exile 2's Fate of the Vaal, blending strategy with high-stakes chaos for endless replayability. Keep following MMOJUGG for more deep dives into 0.4.0's Last of the Druids.
You may also like: Master the core mechanics of the Fate of the Vaal League, from Temple building to Vaal currencies and boss fights.
Looking for more Path of Exile 2 Guides?
Get exclusive insights into Leagues, Act Bosses, Economy, Crafting and Endgame Progression—all in our comprehensive PoE2 hub.
👉 Visit Our Fate of the Vaal Guide Hub Buy PoE2 Currency
 PoE2 Boosting