- Home
- News & Guides
Path of Exile 2 Act 3 Campaign Walkthrough Guide
Last updated on April 1, 2025 by MMOJUGG Team | Game: Path of Exile 2 Guide |
Act 3 of Path of Exile 2 throws you into a whirlwind of sprawling zones, cryptic paths, and rewarding challenges. From the eerie Sand Swept Marsh to the ominous Black Chambers, this guide breaks down every area with clear, actionable tips to keep you on track. Whether you're a loot-hungry veteran or a curious newbie, these strategies will help you slice through the campaign with confidence—and maybe even enjoy the chaos along the way. Let's dive in!
Sand Swept Marsh: Straight-Line Simplicity
Act 3 kicks off in the Sand Swept Marsh, where your spawn direction sets the tone. The entrance to Ziggurat Encampment lies roughly in a straight line from where you start—think of it as a rectangle with the exit along the top wall. Head that way, ignoring dead ends (like the one with an uncut skill gem guy). Keep pushing forward, and you'll spot the encampment soon enough. Bonus tip: swing left or right from there to find the Azac Campfire—two rare mobs guard a chest with a guaranteed Lesser Jeweler's Orb. Look for leaf-roofed huts to know you're close.
Jungle Ruins: Square Dance
Next up, Jungle Ruins feels massive, but picture it as a square, and it's a breeze. Spawn on one side, aim for the opposite edge—hug the outside wall to get there. Along the way, watch for Venom Crypts (one of nine equidistant spawn spots—think 3x3 grid) and the Infested Barons exit at the top. Another gem: Silverfist, who drops two weapon set skill points, lurks in the top third of the square, usually in one of three spots. Scan the top, then dip to the middle if he's playing hide-and-seek.
Infested Barons: Edge Runner's Paradise
Infested Barons keeps it simple—stick to the outside edge and skip the middle. You're hunting three things: the Azac Bog entrance (long bridge marks it), Chimerell Wetlands entry, and a waypoint where Elva spawns with a soul core socket (grab it early, fill it later). No need for fancy routes—just circle the perimeter, snag what you need, and move on. A random encounter might drop a support gem, but the edge is your golden ticket.
Azac Bog: Quadrant Quest
Azac Bog's a beast, but break it into a square with four quadrants, and it's manageable. The boss hides in the upper-right quadrant—hug the right outside edge and head up. It might lean top or left within that zone, but you'll find it by sticking to the plan. This massive area begs for efficiency, so avoid full clears unless you're XP-starved. Future patches might tweak it, but for now, upper-right is your north star.
Chimerell Wetlands: Wall-Hugger's Win
Chimerell Wetlands keeps the edge-running theme alive. Hug a wall—left in softcore, right in SSF—to find the Cyclopsian boss arena (always left-facing) faster. Keep going north from there to hit the Temple of Chaos. Layouts might shift between leagues, but the wall trick holds strong. Don't miss turnoffs—Cyclopsian's square tile is a dead giveaway, and Temple's distinct look seals the deal.
Hinani's Machinarium: Soul Core Hunt
Hinani's Machinarium splits into two segments. First, find a Small Soul Core—left or right of the waypoint and stone altar. Listen for a jingle (crank your sound or loot filter) to pinpoint it. Unlock the altar, then enter segment two: a square where the Hinani's Sanctum exit lies in a straight line (might bend once). Grab two more soul cores en route—Blackjaw, an optional boss offering +10 fire resistance, spawns near the top, left or right by a checkpoint. Speedrunners can skip him, but the buff's worth it for casual runs.
Hinani's Sanctum: Mirror Maze
Hinani's Sanctum is two mirrored squares split by a middle line. Each side has a generator needing a Medium Soul Core—head to the top of each square to find them. That jingle's your friend again, though directional sound can trick you. Pro tip: spam respawn at the checkpoint to cheese a core spawn (US players with fast load screens rejoice). Power both generators, grab the Large Soul Core, and take down the boss. Don't respawn mid-run—you'll lose your cores!
Matland Waterways: Lever Labyrinth
Back at Infested Barons, use that Large Soul Core to unlock Matland Waterways. This linear slog is all about levers—pull them to progress, no wrong turns possible. It zigzags left-right, but you can't get lost. Love it or hate it, it's a straight shot to drain Ziggurat Encampment's water, setting up your next move. Take it slow, and you're golden.
Drowned City: Set Path, Double Duty
Drowned City's layout is fixed and mirrors Utal later—learn it once, win twice. From the waypoint, go straight up until you hit a wall, turn right, then take the first or third turnoff (varies by league) to Ambush. From there, right then left leads to Apex of Filth. Detour straight-then-left from the wall for Titan Forge/Molten Vault—it's a right-leaning, in-out path to unlock the reforging bench. Run it once per league, and you're set.
Apex of Filth: Spiral Sprint
Apex of Filth is a square with a spiral twist. Start straight, hit a dead-end wall (key landmark), then curl inward—up, along a causeway with filth pools, down across a bridge, and left to the boss. Ancient carvings and checkpoints guide you. The boss sits opposite that dead end, so use it as your mental anchor. Run it a few times, and the spiral clicks.
Temple of Kopec: Triangle Trek
Temple of Kopec's a two-floor triangle. On floor one, the stairs to floor two hide in a corner—top-left or top-right. No clear clue yet, so check both (Leap Slam speeds it up). Floor two's also triangular—look for a rift you can't cross without circling around. The boss stairs are on the other side. Simple once you spot the rift; otherwise, corner-hop 'til you're up.
Utal: Drowned City Redux
Utal's Drowned City in the past—same layout, different vibe. Waypoint up, hit a wall, turn right, and take the first or third turnoff (SSF might shift it). Follow flat tiles to Viper—straight, then adjust up or down. Post-Viper, it's right, down, and straight to the exit. Familiarity from Drowned City makes this a cakewalk.
Agarat: Worship and Wander
Agarat's multi-sectioned but readable. First, find the Worship Platform—big straight path with blood rivers and Vaz worshippers. Cross to the checkpoint. Section two: left's the way, right's a dead end (softcore seed). It loops to Black Chambers. Grab Sacrificial Heart (+2 weapon set skill points) down and right from the checkpoint—don't miss it!
Black Chambers: Bridge the Gap
Black Chambers closes Act 3 with three rectangles linked by bridges. From your spawn direction, go straight to the first bridge, cross to rectangle two, hit the checkpoint bridge, then beeline through rectangle three to Doriani. It's in line with the entrance—bridges and middle lines keep you oriented. Slay her, and Act 3's yours.
Thanks for Reading
Act 3 of Path of Exile 2 is a wild ride, but with these zone-by-zone breakdowns, you'll carve through it like a champ. Keep exploring, tweak your tactics, and stay tuned to MMOJUGG for more Wraeclast mastery!
Special Pack for Your Endgame:
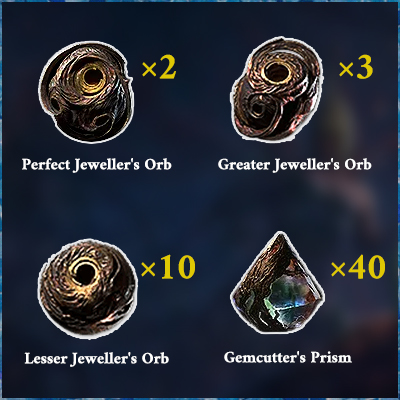
Also, we made some packs for your endgame! Easy Trading (Divine x50, Exalted x400), All-in-One Quality Pack (Etcher, Whetstones, Scraps, Baubles), and Ultimate Skill Pack (Gemcutters and Jewellers). Awesome, right? Check them Out!


Table of Content
 Buy PoE2 Currency
 PoE2 Boosting