Path of Exile 2 Act 2 Campaign Walkthrough Guide
Last updated on April 1, 2025 by MMOJUGG Team | Game: PoE2 (Runes of Aldur 0.5.0) Guide |
Path of Exile 2's Act 2 is a labyrinth of danger and discovery, packed with unique zones that test your navigation skills as much as your combat prowess. From the dusty Vaseri Outskirts to the ominous Dreadnaught Vanguard, this guide covers every area in detail, blending practical strategies with a dash of flair to keep you moving forward. Whether you're chasing loot or just trying to survive, here's how to master Act 2's sprawling campaign.
Vaseri Outskirts: Wall-Hugging 101
Fresh off slaying Geonor, Act 2 drops you in the Vaseri Outskirts. The town leans left (backslash vibes) or right (forward slash energy), hinting at your exit—south or north. Pick the wall matching the lean and stick to it like glue. You're hunting a narrow canyon or quarry leading to Wrathbreaker. The path might twist into a U or flip the other way, but hugging that wall cuts through the confusion. Clear out some hyenas, smash the boss, and you're ready for the next leg.
Modern Quarry: Bridges, Loops, and S-Shapes
After the boss, pop into town, chat with Zaka, and join the Ardura caravan. Halani Gate's blocked for now, but you can speed things up—run near Asala to trigger her exclamation mark, then dart back without sitting through the dialogue. Next stop: Modern Quarry. This zone's a tease with its loop, S, or Z layouts, split by three big areas connected by checkpoint bridges. Pick an edge and follow it—S-shape in mind? Cut corners to save time. Watch for dead-end bridges with cheeky chests; they're rarely worth it. Cross into the Modern Mine, and keep the momentum going.
Modern Mine: Straight Up to Victory
Modern Mine keeps it simple. You spawn at the bottom (or slightly off-center) and climb a diamond-shaped path to the top, where the boss lurks—dead center or just off to the side. No gimmicks, no fuss—just charge upward, slay the boss, and bask in the straightforward glory. Future updates might rotate things, but for now, “up” is your mantra. Easy loot, easy win.
Halani Gates: Follow the Clues
With the mine down, Halani Gates unlocks. This winding beast throws two key markers your way: the Six Sisters staircase and the Decree of Imprisonment. The Six Sisters—a grand staircase with a flashy pop-up—signals you're on track. The Decree's an intersection: yellow paper seals point to Balbala (ascendancy rewards await), while the other path heads to the exit. Seals not your thing? Keep moving for the gates. An early Six Sisters can mean Balbala's nearby, so run it a few times to feel the flow.
Keth: Snake Charmer's Delight
Post-Halani, you'll cross three bridges and tussle with Jamanra, then pick your next zone. Keth's a gem—home to Cabala the Constrictor Queen and two juicy skill points. From the entrance, hug a wall; the exit's typically opposite your start in this rectangular sprawl. Spot a head-shaped tile? Cabala's chilling left or right of it. Miss her? Loop back the other way. The outer edge is your friend—stick to it, and she'll slither into view.
Lost City: V-Bridge Mastery
The Lost City's massive, but split it into two rectangles with a V-shaped bridge, and it's tameable. In the first rectangle, scour the corners for the bridge (checkpoint included). Pro tip: hunt the first area for a tomb packing a level 6 or 7 spirit gem—perfect for early power spikes. Cross over, hit the second rectangle, and beeline to the far end for a wing-shaped boss tile. Think bird or plane—it's a standout once you clock it.
Buried Shrines: Crowns and Crossings
Buried Shrines echoes Lost City's vibe—two rectangles, this time split by twin bridges. Check your spawn angle (north-to-south or south-to-north), then hug a wall eastward. The boss tile, Heart of Keth, rocks a crown-like design, sometimes after a tight passage. Stick to your chosen wall, and you'll crown yourself victor in no time.
Macedon Badlands: Blob Buster
Macedon Badlands is a shapeless mess, but there's a method to the madness. Hug the wall opposite the waypoint and follow it to Bone Pits. It's not the fastest route, but it's foolproof—and the XP's decent if you can handle the mobs. An effigy offers an uncut support gem if you're feeling clicky, but the wall's your real MVP here.
Bone Pits: Tusks and Trajectories
Bone Pits keeps the blob aesthetic. Pass through the tusks or arch, note your angle (south-to-north, maybe), and charge in that direction. The boss room's roughly in line—think of a cone fanning out from your entry point. Twists and turns throw you off, but stay the course, and you'll find it. No middle exits here, so edge-running reigns supreme.
Valley of the Titan: Seal Safari
Valley of the Titan demands you crack three ancient seals. Start on the outside edge—two seals usually pop up there. Third one's shy? Check the inner edge of the central gorge (or mountain). Nab the medallion quest by the waypoint for a permanent buff, then storm Titan Grotto. The camera zoom-out flags the entrance—grab that checkpoint and get ready for more.
Titan Grotto: Rectangle Rumble
Titan Grotto's a sprawling rectangle. Pick its direction (northeast, say) and sprint to the opposite side. The boss hides on the far edge—twists aplenty, but “up” or “across” keeps you sane. Pro tip: fight the boss at 12:00 for phase one (his attacks whiff), then shift to 2:00-3:00 for phase two. Dodge, slay, and strut your stuff.
Dar: Buildings and Bodies
Dar's another rectangle duo. The first section's tight with ruined buildings—run straight through. A connecting path leads to the second, packed with pentagon-octagon structures. Quest alert: find a fallen Dar warrior's body at a building's base for rewards. Keep moving in your entry direction (southeast, maybe), and the Path of Morning exit awaits at the far end. Check those building edges as you go.
Path of Morning: The 333 Trick
Path of Morning's layouts are wild, but the “333” pattern's a lifesaver if you spot it. From the entrance, it's three buildings, up-right, three more, down-right, three again, then up-right to the exit. Not seeing it? Just push to the opposite side through the twists. Recognize the 333, and you'll zip through like a pro—otherwise, grit your teeth and explore.
Spires of Dashar: Straight to the Boss
Spires of Dashar is refreshingly direct—boss is opposite the entrance. Detour for Sisters of Garacon (+10 lightning resistance) if you spot it: bottom and right access, four platforms around. Don't click it unprepared—lightning birds swarm hard. Otherwise, beeline down and right for Togal the Defiler. Straight line, big win.
Dreadnaught: Caravan Chaos
Dreadnaught's a caravan crawl—stick to your spawn direction and roll with the in-out-in-out flow. Long straight stretches and a left turn lead to Dreadnaught Vanguard. It's rippy, so pace yourself—slow and steady trumps reckless here. Farm XP at the checkpoint's magic packs if you're bold.
Dreadnaught Vanguard: Jamanra Showdown
Dreadnaught Vanguard mirrors its predecessor—same in-out pattern, bridge start, and steady push. Leap Slam cuts the slog if you've got it. Jamanra waits at the end, capping Act 2 with a bang. Take your time, dodge the nasty stuff, and you're golden.
Thanks for Reading
Act 2 of Path of Exile 2 is a beast, but with these zone-by-zone breakdowns, you've got the tools to own it. Keep exploring, tweak your strategies, and stay tuned to MMOJUGG for more Wraeclast wisdom!
Special Pack for Your Endgame:
Also, we made some packs for your endgame! Easy Trading (Divine x50, Exalted x400), All-in-One Quality Pack (Etcher, Whetstones, Scraps, Baubles), and Ultimate Skill Pack (Gemcutters and Jewellers). Awesome, right? Check them Out!


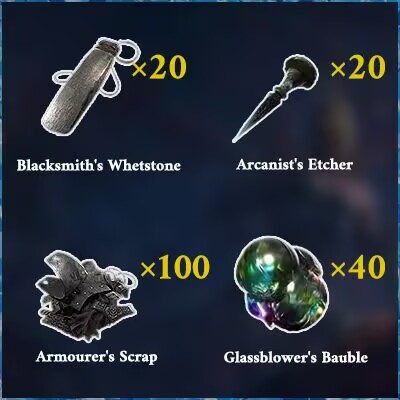
Table of Content
 Buy PoE2 Currency
 PoE2 Boosting