Path of Exile 2 Act 1 Walkthrough: Conquer the Chaos Hey, Exile! Act 1 of Path of Exile 2 is a brutal baptism - zombie-infested rivers, cursed forests and bosses that'll make you sweat. This guide is packed with every trick I've learnt from the grind, prioritising layout mastery, quest objectives and boss-crushing strategies. From the humble Riverbank to the epic showdown in Augum Manor, I've got you covered with detailed breakdowns and pro tips. Let's dive into the madness and emerge victorious!
The Bloated Miller guards the Besieged Encampment - far more challenging than the Hillock from PoE 1. Its moves: a random saw swing (no biggie), a charge that pins you (roll away quickly - no telegraph), and a Sunder shockwave (red flash, exclamation sound - wait 1 second, dodge sideways). Black Cloud adds a Swarm - auto attack them down; it's your most powerful early tool, building up combo points. Shock skills (such as Lightning Strike) increase damage if you've got them. Loot his corpse - complete the quest - then enter the Clearfell encampment. Renly the Blacksmith will greet you behind the bridge (wait for his log animation) with a level 1 uncut skill - right-click to engrave it. Clear the gear zone if it's your first run - the red feather mobs hit hard, but flask charges replenish at checkpoints.
Clearfell
Keypoint: Treacherous Grounds optional quest-kill the Devourer in the Mud Burrow; Secrets in the Dark starts with Una.
Clearfell is your Act 1 hub - the layout is set for softcore, but hardcore/SSF may change it. Talk to Una for Secrets in the Dark, then explore:
Mysterious campsite: Up on the left, near a checkpoint chest, often drops a level 1 uncut Skill Gem.
Mud Burrow: Near the waypoint, a straight tunnel to The Vile Nest. The Devourer fires a slow red circle projectile at range. Exclamations hint at a face slash or fast chaos shots (below 50%, tail swipes) - dodge them all. Rewards: Level 2 uncut Skill Gem, plus a Renly Support Gem (Treacherous Grounds completed).
Bayra: North-east, Snowy Mountain - her singing is a dead giveaway. Energy shield regenerates when you leave; dodge rune spikes and wolf explosions. Kill her for +10 cold resistance - farm her for rares if you are low on gear.
Grelwood entrance: Near Bayra - boss kill event has turned left, so watch the patches.
Run left to the campsite, then 45° northeast to Bayra - grab the loot quickly and push on to Grelwood.
Grelwood
Keypoint: Secrets in the Dark - search for the Count's proof, summon Una at the Tree of Souls, next hit the Red Veil.
Grelwood is a diamond-shaped area - four quadrants, changing layouts (flipped/rotated in Hardcore). Key spots:
Arian's hut: Arian teleports, places elemental circles (huge explosion damage) and slows with a cold beam. Ranged? Kite her. Melee? Dodge. Drops an uncut support gem and medium flasks - skip if you're stocked.
Bramblegast: Rugby arena, bramble walls. Summons chaos vine slams (dodge roll) and tracking orbs (pause, run after flash). Stun/Freeze him - level 2 uncut Skill Gem is yours.
Grim Tangle entrance: Mid map, yellow mushrooms explode - grab the waypoint, exit for now.
Tree of Souls: Near a waypoint, summon Una from the Hooded One for Secrets in the Dark. Later you can use the rune spikes here.
Start at Arian's, orientate yourself - sweep clockwise. The Red Veil exit is at the edge - right corners first. Chance hits, but the diamond holds - the loot is worth it.
Red Veil
Keypoint: Secrets in the Dark - find three Obelisks of Rust, slay the Rust King, forge rune spikes with Renly.
Red Veil is a maze - eight layouts, slow mobs, juicy XP. Poison spitters lurk, but sound is your guide: Obelisks of Rust hum, ground turns red. The first two spawn adds - kill them. The third unleashes The Rust King - flaming weapon tosses vary (watch his arms), resists fire/physical, weak to lightning. Zap him, loot Running Girdle/Guard/Skullcap. Port to Renly - he forges rune spikes - then back to Grelwood's Tree of Souls. Pierce the three rune seals, free The Hooded One, talk to Una twice (Grelwood, then Clearfell) to complete the quest. Don't overdo it - run, kill, collect.
Grim Tangle
Keypoint: The Mysterious Shade - summon Una, reach the Graveyard of the Eternals.
Grim Tangle is an underground dungeon - the exit is often opposite the entrance, but there are many twists and turns. Enter from Grelwood, summon Una at the vines - her song will clear them (skip it: click, run, respawn at the checkpoint). Yellow mushrooms and dead mobs leave DoT pools - step lively. The Rotten Druid is optional in the Druid's Den - teleports, fires projectiles, summons vines. Exclamation cues a 4-second rock throw (one-shot-wait, roll) or a spore circle trap (chaos explosions). Kill for an uncut support gem, then push towards the graveyard exit. It's a grim shortcut - keep moving.
Graveyard of the Eternals: Triple Threat
Keypoint: Sorrow Among Stones - collect keys from Draven and Asinia, defeat Lachlann of Endless Lament.
This graveyard is a boss marathon - run the outer rim:
Tomb of the Consort: Asinia's bone cages spawn spikes - break or roll out before the meteors crash. Call Draven for backup - her projectile ult (ghost-triggered?) floods the arena. Range, circle, dodge their four circles - grab their Memorial Key Piece.
Praetor's Mausoleum: Draven's ribbed tile screams boss room. Cursed sigils explode quickly on a wide roll. Semicircle projectiles fan out, Beam helps Asinia dodge them all, loot his Key Piece.
Sarcophagus: Checkpoint-adjacent, drops an iron ring - attack builds rejoice.
Take the key to Lachlann at the Memorial Gate - he will transform into Lachlann of Endless Lament. Kite around the tombstone - double hits (front, back) lack telegraphy, cone shockwave is dodgeable. Ghouls dive or spiral out of spirals. Skip his dialogue: activate checkpoint, respawn. Loot Count Lachlann's Ring Quest completed, Hunting Grounds unlocked.
Hunting Grounds: Edge Runner
Keypoint: The Trail of Corruption - reach Augum Farmlands; Ominous Altars optional quest starts with Finn.
Hug the edge counter-clockwise:
Freythorn Entrance: Waypoint, exit rituals later.
Augum Farmlands Entrance: Waypoint, dip-main quest next.
Crowbell: Canyon rim, pit-like tile. Phase one: Slams/Leaps-dodge close. Phase two: Bell slam (dodge), light swing (meh) - stun him in the gated arena for two weapon set skill points.
Dryadic Ritual - centre, slash for a level 4 uncut skill gem.
Density Spike - Red feather mobs and rares swarm; death wipes loot. Talk to Finn in Clearfell for Ominous Altars - Freythorn is your target. It's a highly rewarding loop - do it yourself.
Augum Farmlands: Lute Loot
Keypoint: The Lost Lute - find Una's lute box; The Trail of Corruption - reach Augum Village.
Linear South Trek Spot: Una's Hut by the Cart Barricade (visual clue: long hut opposite). Inside, Una's Lute Box gives two skill points (return to Una). The crop circle in the wheat field spawns Vargir the Feral Mutt - ground circles hurt, chaos shards drop. Exit to Augum Village via checkpoint - wheat hides mobs, so be careful. Quick loot, big step forward.
Freythorn: Ritual Roulette
Keypoint: Ominous Altars - activate three altars, kill king in the mists, reward from Finn.
Four rituals - three normal, one smoky (last). Clear mobs, touch altars - respawns scale up. King in the Mists: Phase one - chaos shots (small), spike cones, DoT patches - dodgeable. Phase two - red/green light (move green, stop red) stuns if botched, chaos ball nukes, purple DoT hunters. Speed's key-strong weapon or co-op shines. Bloom Skull loot gem: +30 Spirit, Aura gem (Herald of Ice pops off). Rituals are rippy - use checkpoints to heal when swarmed. Finn's reward awaits in Clearfell.
Augum Village: Axe and Tools
Keypoint: The Trail of Corruption - defeat The Executioner, free Leitis; Find the Forge - grab Renly's tools.
Right wall to The Executioner - Guillotine Slam (Exclamation, Cloud One Shot), Shockwave, Thunderwave - dodge all. Release Leitis on the platform for a level 5 uncut Skill Gem. Left wall to Renly's workshop - 'bong' calls his tools (unlocks salvage bank). The rune chest behind the table is a first-time grab. Brutal fight, clever reward - wrap it with Leitis in Clearfell.
Manor Ramparts: U-Turn
Keypoint: The Mad Wolf of Ogham - reach Augum Manor.
U-Turn (C in Hardcore) - left of Augum Village, loop to the courtyard. Pass the gallows - cut the rope for an uncut support gem (left of manor entrance, right if flipped). Blood pools from mob bites - stick to the road. It's a tight, readable sprint - monsters escalate, but the layout is your friend. Augum Manor is the prize - don't dawdle.
Augum Manor: Wolf's Den
Keypoint: The Mad Wolf of Ogham - defeat Count Geonor, end Act 1 with The Hooded One.
Three floors, two rectangles each, connected by bridges - here's the full scoop:
Floor 1: Candlemass spawns in three places - left wall (cramped), before the bridge (sneaky), or exit side (open). Candles light up, fire blasts forward, stand behind, hit hard. Three layouts: softcore's upright, hardcore's reversed - same rectangles, reversed flow. Kill for +20 max life - fire resist or antifreeze spells make it easier. Stairs mark the exit - explore side rooms for coins.
Floor 2: Bridge to stairs - DoT pools from mobs, no loot. Down left in softcore, up right if flipped - easy passage. Speedrunners skip fights here - mobs respawn on death anyway.
Floor 3: Geonor's arena epic finale. Phase one: lunges (light), 180° sword sweep (half-arena, roll), V-ice walls (shatter—get out back). Wolf form (10% HP): full regen, fog spawns beefy adds (swarm risk—clear fast), red circles (dodge quick), cold beams (freeze threat—move). Desolation Icebreath chills - Sidestep. Fog charges (taunt, roll), red beams mix in—chaos peaks. Speed strategy: hit Geonor, return to Candlemass during Sin's cutscene. Loot ends Act 1—Hooded One's chat kicks off Act 2.
The level 5 gem from Leitis shines here. It's your crowning glory - own it.
Bonus Tips for Success
Gear: Disenchant blues (transmute shards), rares (royal shards) - vendors sell bases.
Dodge: Sideways for telegraphs - backfiring fails.
Checkpoints: Refill flasks, skip songs/dialogue (Una, Lachlann).
Explore: Optional bosses (Candlemass, Crowbell) boost power.
Thanks for Reading
Act 1's a gauntlet, but you're armed to the teeth now—especially for Geonor's lair. Keep killing, Exile, and stay tuned to MMOJUGG for more!
Special Pack for Your Endgame:
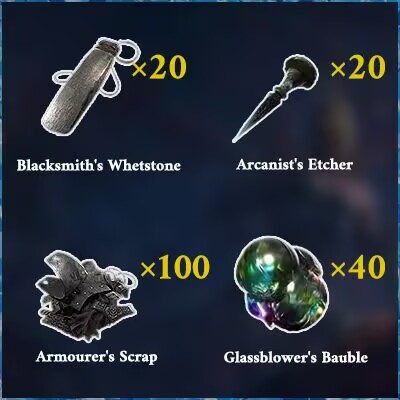
Also, we made some packs for your endgame! Easy Trading (Divine x50, Exalted x400), All-in-One Quality Pack (Etcher, Whetstones, Scraps, Baubles), and Ultimate Skill Pack (Gemcutters and Jewellers). Awesome, right?
Check them Out!


 Buy PoE2 Currency
 PoE2 Boosting