Dune Awakening Deep Desert Weekly: Nov 25 - Dec 1
Last updated on November 26, 2025 by MMOJUGG Team | Game: Dune Awakening Guide | Tags: Dune Awakening Deep Desert
Arrakis whispers promises of power to those who listen, but only the cunning thrive amid its endless dunes. This Week, the Coriolis storm has carved a fresh battlefield in the Deep Desert, tilting fortunes toward the east with clusters of vital resources and high-stakes POIs that could redefine your sietch's arsenal. From blueprint-laden shipwrecks to spice plumes pulsing with potential, every grain of sand hides a strategy for survival or supremacy.
As you map your path through these volatile winds, why not pin this guide for your next sortie? It could be the edge that turns a skirmish into a saga. And for those gearing up, our Dune Awakening Shop offers a trove of Solari, Spice Melange, Crafting Resources, vehicles, unique gear, schematics, and more—ready to bolster your trek across the erg.
Navigating the Island Layout
The Deep Desert's weekly reset isn't just a refresh; it's a seismic shift that reshapes alliances and outposts. This cycle, the Coriolis has sculpted a landscape where the west yawns empty—a vast, barren stretch from the mid-grid westward, lacking the interlocking island chains of prior weeks. This void forces early decisions: cling to the sparse E1-E2 blocks for a tentative foothold, or leap toward the heart-pounding action where opportunity densifies.
Central staging grounds anchor in the E5-E6 chain, a sprawling island complex that juts like a defiant spine against the storm's fury. Here, ample flatland invites robust base expansions—think fortified refineries humming with activity or ornithopter pads for swift raids. Yet, the true siren call emanates eastward: the colossal E5 outlier island serves as a gateway to the E7-E9 hotspots, where terrain favors the bold. These zones boast elevated plateaus for defensive perches and proximity to resource veins, minimizing travel time to contested sites.
Rushing E7 or E9 means claiming the map's pulse before the zergs descend—ideal for guilds eyeing dominance. If traffic clogs those prime tiles, pivot to D8's flexible corners or D5's node-dodging nooks. As a fallback, the far-west E1-E2-D1-D2 cluster provides basic scaffolding and testing station links, though it trades excitement for relative safety. Remember, bases here aren't mere shelters; they're launchpads for probing the erg's underbelly, where Shai-Hulud's tremors remind you that no foundation is eternal.
Zone | Terrain Features | Strategic Perks | Risks |
|---|---|---|---|
E7-E9 (East Prime) | Elevated islands, rock outcrops | Quick POI raids, resource adjacency | High PvP influx, worm patrols |
E5-E6 (Central Hub) | Expansive flatlands, chain links | Versatile building, balanced access | Moderate traffic, exposure to storms |
D8/D5 (Alternatives) | Corner pockets, node buffers | Evasive positioning, quick escapes | Potential blockades, limited scale |
E1-E2/D1-D2 (West Safe) | Scattered basics, station proximity | Low-threat farming, easy entry | Resource scarcity, isolation |
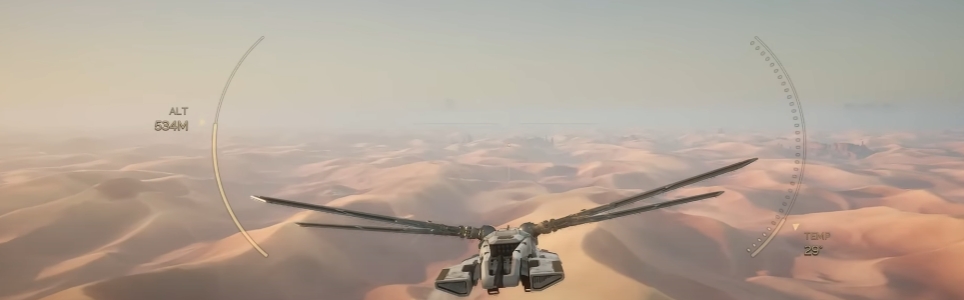
In the Deep Desert's 500+ km² expanse—a PvPvE colossus dwarfing Hagga Basin's 64 km²—these islands dictate your rhythm. Scout via ornithopter for hidden crevices, and always layer defenses: sand barriers against blasts, sensor arrays for ambushes.
Resource Distribution Edge
Resources in the Deep Desert aren't scattered whimsically; they're engineered lures that reward eastward aggression. Basic minerals cascade heavily to the east, manifesting as dense Stravidium nodes—turquoise-green plates glinting on crimson canyon slopes, often nestled near derelict wrecks or worm-scarred ridges. These yield Stravidium Mass, the precursor to Stravidium Fiber, essential for Plastanium Ingots that forge Mk6 gear.
Crowning this bounty is the I5 deep Titanium node: a monolithic vein of blue-spiked ore protruding from gray-blue dunes, harvestable only with Mk5+ Cut Array tools. Titanium Ore here pulses with endgame potential, combining with Stravidium in Medium or Large Ore Refineries to birth ingots that armor your ornithopter or sharpen your lasgun. Westward, Stravidium trickles in thin veins—enough for sustainment, but a far cry from the east's abundance. Halve the grid longitudinally, and the disparity screams: east claims 70%+ of high-tier yields, compelling bases to migrate or perish.
Farming efficiency hinges on preparation. Deploy a crawler for bulk hauls or an ornithopter for precision strikes—loadouts with storage upgrades like expanded cargo bays turn runs into windfalls. Watch for "rich clusters": weekly hotspots (often two per reset) packing 100+ nodes of one type, typically in PvP fringes. Refine on-site with portable setups to dodge hauls back to Hagga Basin, but beware sandworms drawn to vibrations. This imbalance isn't cruelty; it's Arrakis testing your adaptability—east for conquerors, west for survivors.
Resource | East Yield | West Yield | Harvest Tips | Endgame Use |
|---|---|---|---|---|
Stravidium Mass | High (multiple clusters near wrecks) | Low (scattered slopes) | Mk5 Cut Array; refine to Fiber with water | Plastanium Ingots, Mk6 alloys |
Titanium Ore | Exceptional (I5 deep vein) | Minimal (isolated spikes) | Ornithopter scouting; mini-game mining | Vehicle frames, weapon casings |
Basic Minerals | Abundant nodes | Thin veins | Resource Density filter (Tier IV) | Base expansion, early crafts |
Pro tip: Pair farming with spice runs—nodes often overlap plumes, yielding Spice-Infused variants for premium dust.
Spice Plume Dynamics
Spice, the desert's lifeblood, evens the scales this week with three large plumes: a central nexus for neutral plays, a far-west sentinel for cautious harvesters, and a deep-east behemoth fueling aggressive pushes. Fewer plumes mean intensified rotations—expect blowouts every 20-30 minutes versus last cycle's sprawl, as the game's algorithm prioritizes uptime on scarcer fields. This volatility suits east bases: the eastern plume syncs seamlessly with E7-E9, enabling conveyor-like harvests where thumpers lure blowouts straight to your stillsuit.
Harvesting demands finesse. Deploy automated rigs for passive gains, but manual sweeps with crysknives net Melange faster—up to 500 units per burst if uncontested. Worms, however, lurk: their seismic rumbles spike during plumes, so tether lines or evasion flares are non-negotiable. In PvP, plumes ignite zergs; coordinate flares or sniper overwatch to hold the field. This setup promises sustained flow—less competition per site translates to richer personal yields, perfect for refining into Spice Melange for trade or buffs.
Plume Location | Rotation Frequency | Harvest Yield Potential | Tactical Notes |
|---|---|---|---|
Central | Medium (25-min cycles) | 300-400 units | Balanced access; good for alliances |
Far West | High (20-min peaks) | 250-350 units | Safer solo; worm-light |
Deep East | Very High (15-20 min) | 400-500+ units | PvP magnet; pair with defenses |
Shipwreck Power Plays
Shipwrecks are the Deep Desert's adrenaline veins, and this reset dumps all large ones eastward: D6's jagged husk, F8's sprawl, and H8's fortified ruin. These PvP crucibles—open to all comers—bristle with offensive schematics, their loot tables rotating weekly to keep raiders sharp. Crashing into dunes post-worm feast, they offer not just blueprints but narrative hooks: faded logs hinting at Imperial betrayals, fueling roleplay in your sietch.
Raiding demands squad synergy: one team clears servok guardians (elite drones with shield-piercing beams), another cracks the constellation chest. Yields skew aggressive—Perforator rifles shredding shields at range, Pulse Knives carving close-quarters chaos. Crash variants (smaller falling wrecks) amplify odds, but large sites guarantee volume. No west spawns force a pilgrimage east, but the payoff? A arsenal upgrade that turns you from scavenger to scourge.
Shipwreck | Grid Spot | Core Loot | PvP Intensity |
|---|---|---|---|
Primary Husk | D6 | Pulse weapons (7%) | Medium; dune cover aids flanks |
Sprawling Ruin | F8 | Disruptors (6-9%) | High; open fields invite dropships |
Fortified Debris | H8 | Shellbursters (7%) | Extreme; chokepoints breed ambushes |
Imperial Testing Station Balance
To temper the east's allure, Imperial Testing Stations scatter like wary sentinels: G3 and I5 for eastern thrusts (defensive havens with Holtzman barriers), D1 and D7 anchoring west (armor caches for tanks). The H5-I5 hybrid claims central ambiguity, reachable from either flank. These mini-dungeons—labyrinths of pressure plates and holographic decoys—guard unique schematics via end-chests, guarded by waves of elite troopers wielding cryo-lances.
Layouts rotate subtly: some feature zero-grav puzzles taxing your suspensors, others trap-filled corridors demanding EMP grenades. Rewards tilt defensive—Power Harness boosting stamina by 20% mid-fight, Adaptive Holtzman Shields absorbing 50% more las-fire. West stations suit solo grinds; east ones, guild pushes against overlapping PvP. Clear times average 10-15 minutes, but contested runs stretch to epics.
Station | Access Bias | Key Schematics | Challenge Level |
|---|---|---|---|
G3/I5 | East/Central | Holtzman Shield (5%), Power Harness (8%) | High; elite waves |
D1/D7 | West | Young Sparky Mk6 (5-7%), Dune Watcher (utility) | Medium; puzzle focus |
H5-I5 | Neutral | Carterizer (endurance), K-28 Lasgun (rare) | Variable; rotation-dependent |
Cave System Positions
Caves carve secrets into the Deep Desert's fringes, with two large systems this week: C8's echoing PvE vault (armor troves amid bioluminescent fungi) and B2's shadowy PvE lair (utility relics in thermal vents). Absent from core dunes, they hug edges—east builds snag C8 via E7 shortcuts, while west claims B2 unmolested. These aren't mere holes; they're ecosystems: dripping aquifers yielding water mid-run, fungal overgrowths concealing side caches.
PvE tags promise safety, but borders blur—scout for flip-flags if guilds contest. Runs yield full sets like Ix-Core armor (low % drops) or Circuit Gauntlets for EMP bursts. Delve deep: hidden ledges hold schematics, but cave-ins demand reinforced picks. East proximity turns C8 into a blueprint buffet, synergizing with nearby shipwrecks for hybrid loadouts.
Cave | Grid Edge | Loot Theme | Exploration Depth |
|---|---|---|---|
Echo Vault | C8 (East-Fringe) | Armor sets (6%), stillsuits | Multi-level; fungal hazards |
Shadow Lair | B2 (West-Fringe) | Utility gear, Regis rifles | Thermal traps; vent puzzles |
Blueprint Loot Mastery
Blueprints are the Deep Desert's currency of conquest, their tables dictating your metagame. East setups harvest a feast: three shipwrecks for offense, two stations for defense, three large nodes for craft, two plumes for sustain, and cave adjacency for utility. Position dictates drops—defensive chasers bunker at stations, offense predators prowl wrecks.
Imperial Testing Stations dispense survival edge: Power Harness (8% for stamina surges), Young Sparky Mk6 (5-7% shield gen), Adaptive Holtzman (5% deflection), with outliers like Dune Watcher scanners or Black Market K-28 Lasguns (~2%). PvP Caves mirror this, unlocking Ix-Core ensembles, Circuit Gauntlets, and Replica Pulse arms (rare, 3-5%).
Shipwrecks roar offense: Perforator (7%, piercing rounds), Replica Pulse-Knife/Sword (7% melee frenzy), Shellburster (7% explosive shot), Regis Disruptor Pistol (6% energy burst), Static Needle (7% stun thread). Crash Ships juice odds—Perforator/Pulse/Shellburster at 12%, Disruptor at 9%—turning raids into schematic storms. PvE Caves like B2/C8 tempt with Villari's Stillsuit (~6%, hydration mastery) or Regis Repeating Rifles.
West lags in volume but excels in safety—D1/D7 stations for steady armor farms. Master loot by rotating runs: dawn for low traffic, dusk for plume-synced hauls. Track weekly tables via planetologist apps; they're your thumper in the void.
Shipwreck Offensive Drops Table:
Blueprint | Drop Rate | Effect Highlights |
|---|---|---|
Perforator | 7% (12% Crash) | High-velocity shredder; ignores 30% armor |
Replica Pulse-Knife | 7% (12% Crash) | Melee vibro-edge; 2x speed bursts |
Replica Pulse-Sword | 7% (12% Crash) | Sweeping arcs; EMP on crits |
Shellburster | 7% (12% Crash) | Shotgun blast; area denial |
Regis Disruptor Pistol | 6% (9% Crash) | Energy pulses; chain lightning |
Static Needle | 7% | Thread traps; immobilize foes |
Station Defensive Drops Table:
Blueprint | Drop Rate | Effect Highlights |
|---|---|---|
Power Harness | 8% | +20% stamina regen; overload vents heat |
Young Sparky Mk6 | 5-7% | Auto-shield deploy; 40% las absorb |
Adaptive Holtzman Shield | 5% | Dynamic barriers; adapts to fire type |
Dune Watcher Scanner | 4% | Threat ping; reveals cloaks 50m out |
Black Market K-28 Lasgun | 2% | Compact beam; fuel-efficient |
FAQs on Deep Desert Map Layout This Week
1. How does the November 2025 Coriolis storm impact base relocation strategies?
This reset's east bias amplifies the need for mobile outposts—E7-E9's terrain supports rapid deploys with ornithopter pads, cutting travel to I5 Titanium by 40%. Relocate via crawlers for bulk mats; scout west voids for fallback evac routes if PvP heats up.
2. What's the optimal route for chaining spice plumes and Stravidium nodes?
Start central plume for warmup (300 units), swing east to Stravidium clusters (15+ nodes/hour with Mk5 tools), then hit the deep-east plume. Total loop: 45 minutes, yielding 700+ Melange and 200 Mass—tether against worms, flare for PvP alerts.
3. Can PvE caves like C8 flip to PvP, and how to counter?
Borders allow contests if guilds flag; monitor chat pings. Counter with Ix-Core sets (6% drop) for tankiness—deploy EMP gauntlets to disrupt intruders, or collapse entrances post-loot for denial. Scout via drone for 200m clears.
4. Why do shipwreck drops like Perforator hit 12% in crashes versus 7% standard?
Crash variants scale rarity inversely to spawn frequency—fewer falls mean richer chests, boosting offense odds to reward risk. Farm D6-F8-H8 sequence: clear guardians first, then chest-crack; yields 2-3 schematics per trio.
5. How to refine I5 Titanium into Plastanium without west-side scarcity issues?
Harvest 6x Ore + Stravidium Fiber in Medium Refineries (water catalyst); east bases cut trips 60%. Build portable setups near nodes—yield 10 ingots/hour solo. Trade excess in Arrakeen for Duraluminum buffers.
Thanks for Reading
Stay vigilant in the sands—keep following MMOJUGG for weekly updates. 👉 [Explore our Dune: Awakening Ultimate Guides Hub Now]
 Buy Dune Awakening Solari
 Buy Dune Awakening Items
 Dune Awakening Boosting