Dune Awakening Deep Desert: November 18-24, 2025
Last updated on November 19, 2025 by MMOJUGG Team | Game: Dune Awakening Guide | Tags: Deep Desert Weekly
The Coriolis storms have reshaped Arrakis once again, delivering one of the densest Deep Desert layouts in recent weeks—perfect for players pushing toward endgame crafting. Whether you're stocking up on Plastanium ingredients, chasing rare schematics, or planning efficient harvesting routes, this rotation offers plenty of opportunities with shorter travel times and balanced risks.
If detailed weekly breakdowns like this help your runs, consider bookmarking the site for future updates, and swing on by our Dune Awakening Shop to pick up Solari, Spice Melange, Crafting Resources, vehicles, unique gear, schematics, and more whenever you need a quick boost.
Exceptional Island Density and Base Building Freedom
This week's map stands out for having almost no empty grid squares—an unusually packed configuration that provides abundant rocky outcrops for forward bases. Sub-islands vary in size, but viable building spots appear in nearly every sector, making it easier than usual to secure real estate close to the PvP boundary without long flights from the Hagga Basin. Even on high-population servers, players report finding uncontested rocks within minutes of entering the zone.
This density reduces fuel costs for ornithopter travel and allows flexible base placement: position near multiple POIs for looping efficiency or deeper for safety during off-peak hours.
Aspect | This Week's Advantage | Practical Impact |
|---|---|---|
Island Coverage | Near-100% grid fill | Minimal scouting time; quick base setup |
Building Proximity | Many rocks adjacent to PvP line | Fast access to contested resources |
Flight Efficiency | Clustered formations | 30-50% less Spice-Infused Fuel per loop |
Centralized High-Tier Resource Nodes
Titanium Ore and Stravidium Mass clusters dominate the absolute center of the map, positioned in mirrored large islands directly opposite each other. This deliberate placement creates a "resource highway" down the middle vertical axis, allowing miners to fill multiple inventories in under 15 minutes before returning to a nearby base.
The nodes respawn on their standard 45-minute timer, but the sheer concentration means even casual visits yield thousands of units. Use a Cutterray MK6 (or Focus Buggy variant) for maximum yield per node.
Resource | Visual Identifier | Recommended Harvest Tool | Average Yield per Cluster |
|---|---|---|---|
Titanium Ore | Deep blue-gray crystalline spikes | Cutterray MK6 / Focus Buggy Array | 800-1200 units |
Stravidium Mass | Turquoise metallic plates | Cutterray MK6 / Compactor upgrades | 600-1000 units |
Six Large Spice Plume Locations and Harvesting Strategy
Six confirmed large-scale spice blows provide excellent melange potential:
Border-accessible: F1 and F5 (high contestation but quick in-and-out)
Deep interior: I2, I4, I7, H9 (safer for extended sessions with Sandcrawler teams)
The western half claims four of these deep plumes, creating a natural advantage for western bases. Large blows form harvestable canyons—deploy thumpers strategically and use compactors for solo-friendly pulls when server activity is low.
Plume Position | Grid | Risk Level | Best Approach Vehicle |
|---|---|---|---|
Border West | F1 | High PvP | Fast ornithopter snatch runs |
Border East | F5 | High PvP | Coordinated group dives |
Deep West | I2, I4 | Medium | Sandcrawler + thumper defense |
Deep West | I7, H9 | Low-Medium | Solo buggy with compactor |
Cave Complexes: PvP vs PvE Farming
PvP Cave (G3): High-traffic competitive dungeon packed with elite mobs and superior schematic tables.
PvE Cave (D8): Relaxed clearing environment ideal for consistent solo or small-group runs.
The PvE cave's eastern placement helps balance the map despite heavier western spice weighting.
Large Shipwreck Coordinates and Weapon Priorities
Four major crashed freighters offer prime weapon schematic chances:
D6 (western-central)
E3 (eastern-central)
F7 (southern border)
I5 (northern edge, accessible from multiple sides)
Prioritize these for Perforator rifles, Regis Disruptor pistols, Shell Buster shotguns, and Replica Pulse series weapons. Clear speed matters—bring Shigawire claws for vertical escapes if ambushed.
Imperial Testing Station Breakdown
Only one dedicated PvE station this week (E8), with three PvP variants:
F4 (border-adjacent)
I1 (deep north)
H8 (eastern deep)
The scarcity of safe stations encourages basing near E8, though this can crowd building space. All stations reset intel (180 free per week) and drop defensive/utility schematics—worth hitting even as a newer player since mobs are often pre-cleared.
Station Type | Locations | Notable Guaranteed/High-Chance Drops |
|---|---|---|
PvE | E8 | Adaptive Holtzman Shield, Power Harness, Young Sparky MK6 |
PvP | F4, I1, H8 | Black Market Lasgun (1%), Carburizer, Dunewatcher |
Detailed Blueprint Loot Tables by POI Type
POI Type | Standout Schematics & Items | Best Player Type |
|---|---|---|
PvE Caves | Focus Buggy Cutter Array MK6, Compactor MK6, Replica Pulse Sword, It Cord Leggings | Solo grinders |
PvP Caves | Full Pincushion armor set, Triple-Shot Repeating Rifle, Compact Compactor MK6 | Defensive PvP builds |
PvE Testing Stations | Adaptive Holtzman Shield, Power Harness, Young Sparky MK6, Replica Pulse Knife | Survival-focused players |
PvP Testing Stations | Black Market Lasgun, Carburizer, Dunewatcher, higher unique rolls | Aggressive PvP loadouts |
Large Shipwrecks | Perforator, Shell Buster, Regis Disruptor Pistol, Replica Pulse Knife/Sword | Weapon hunters |
Optimal Base Location Recommendations
Western sectors provide the clearest advantage this rotation:
More uncontested rock space
Proximity to four deep spice plumes + PvE cave
Reasonable travel to central resource nodes and most shipwrecks
Eastern bases remain perfectly viable if you prioritize shipwreck farming or prefer quieter PvE cave runs. With a functional ornithopter, no location is truly "bad"—the dense layout keeps everything within 3-5 minutes flight.
Criteria | Western Edge Preference | Eastern Alternative Viability |
|---|---|---|
Open Real Estate | ★★★★★ | ★★★ |
Deep Spice Access | 4 plumes | Border-reliant |
Cave Convenience | PvE close | PvE adjacent |
Shipwreck Reach | All four accessible | Strong on E3/F7 |
Overall Recommendation | Primary choice | Solid backup |
FAQs on Deep Desert November 18-24, 2025
1. When exactly does the Deep Desert reset occur?
The full Coriolis Storm reset happens every Tuesday during scheduled maintenance, wiping all player bases, resource nodes, and POI states while generating an entirely new island layout.
2. Do Titanium and Stravidium nodes stay depleted for the whole week?
Individual nodes deplete permanently once mined but follow a 45-minute respawn timer in new locations within the same clusters until next Tuesday's reset.
3. Is the G3 PvP cave worth attempting solo this week?
Absolutely possible during off-peak hours or after larger groups have cleared mobs—many players sneak in for chests. For guaranteed runs, stick to the D8 PvE cave.
4. What's the most efficient way to harvest the six large spice plumes solo?
Focus on the deeper I-row/H9 plumes first during low-activity periods. Use a heavily upgraded buggy with compactor modules and multiple thumpers; avoid canyon-forming blows unless you have quick escape routes planned.
5. Are Imperial Testing Stations still valuable with only one PvE option?
Yes—the E8 PvE station alone provides free weekly intel plus reliable defensive schematics. PvP stations dramatically increase rare weapon drop rates, making them worth organized pushes.
6. How does this week's dense map affect Sandworm encounters?
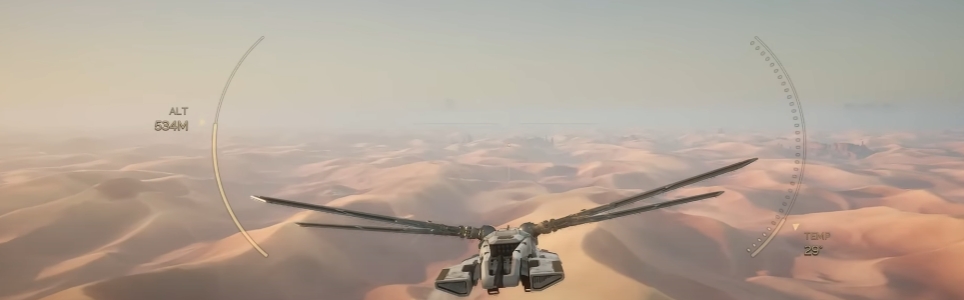
More rocks mean safer travel paths and fewer forced open-sand crossings. Stay above 400m in ornithopters when possible and always carry thumpers for emergency spice pulls.
7. Which shipwreck should I prioritize for the best weapon chances?
Start with D6 or E3 for central convenience, then branch to F7/I5. All four share identical loot tables, so proximity to your base is the deciding factor.
Thanks for Reading
Stay tuned to MMOJUGG for next week's reset coverage and more Arrakis mastery guides. The spice must flow—and so must the knowledge. Safe flying out there, sleepers. 👉 [Explore our Dune: Awakening Ultimate Guides Hub Now]
 Buy Dune Awakening Solari
 Buy Dune Awakening Items
 Dune Awakening Boosting